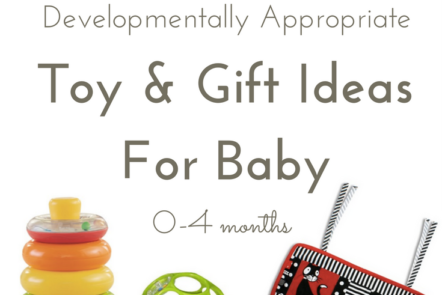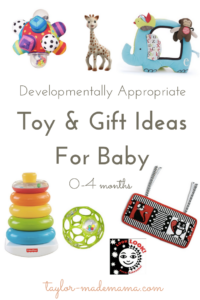
Toy & Gift Ideas for Baby

Developmentally Appropriate Toy & Gift Ideas for Baby (0-4 months old)

This post may contain affiliate links. You can trust that views are 100% mine.

If you are anything like me, the plethora of baby toys out there is completely overwhelming; the potential of wasted money and unused toys laying around the house seems inevitable. In this post I will share the developmentally appropriate toys that Taylor actually engaged with from 0-4 months old, and at which month I introduced them to her. Hopefully this will help you narrow down the field if you are in the market for your own babe, or a gift for someone else’s. Of course, every baby is different and will gravitate toward certain toys according to their individual interests, but I’d bet that most of these are universal baby favs!

In choosing toys for Taylor I asked three main questions:

  1. Based on research, which toys are best for development?
  2. Which toys will my baby actually engage with at what month/age?
  3. Which toy are not so completely obnoxious that I won’t be able to stand having them around?

A great source to answer the first question is a blog written by a Mama/Occupational Therapist:
Mama OT. She has great toy and gift guides that list items that will support the development of little ones at various ages and stages. I definitely bought Taylor several toys based on her advice. I also work with Occupational Therapists and School Psychologists regularly in my line of work, and the gifts they gave Taylor are also included in this list – I’d say they are pretty trustworthy sources for developmentally appropriate toys as well!

Month 1

During the first month of life newborns are sleepy little blobs of cuteness that can’t do a whole lot else but eat/poop/sleep, but it’s still important to introduce sensory stimulation – auditory, tactile, and visual. They can see objects 8-10 inches away but can’t make out details or the full color spectrum just yet. They also like to look at faces, especially Mommy and Daddy’s! I bought Taylor several black, white and red high contrast items that she was really into (she was particularly taken with the beaver on the  crib bumper shown below!).

Below are the 5 items she focussed on most during her first month:

Black and white crib bumper

Baby Faces board book:

Black and white board books like this one:

Skip Hop Alphabet Zoo Activity Mirror:

Baby Einstein Take Along Tunes Musical Toy:

Month 2

At 2 months old, colors and high contrast items are still super important to stimulate a baby’s visual senses. They’re starting to figure out the world a bit more by this point. This is a great time to introduce a play gym – you can rotate the hanging toys every few days or change your babies position to open up a whole new visual world. Play gyms, like the one I linked below, are also perfect for tummy time as there is plenty to look at and touch on the mat itself.

Here are some of items that we used a ton during Taylor’s 2nd month:

Set of rings (we use these to dangle toys from her stroller bar or bring objects on the play gym nearer to her vision/reach. She also just liked to watch a chain of rings dangled in front of her.):

High contrast books (ones with repetition, colorful pictures, bath books, or indestructible/board books for teething later on are best):

Sassy Developmental Bumpy Ball (she loves this ball even more now that she can grab and not just stare at it!):

Skip Hop play gym:

Month 3

At 3 months your baby will likely begin to touch, bat at, or even grab everything within reach. I tried to find toys I could place in her hands that she could hold onto as she developed this new physical skill. Here are a few toys that Taylor enjoyed and could easily grasp at this age:

Oball and Oball rattle:

Lamaze Musical Inchworm (this was her BFF for several weeks.):

Are You My Mother cloth book (T LOVES to pull the little stuffed bird out of the nest!):

Manhattan Toy Winkel Rattle and Sensory Teether Activity Toy:

Month 4

During month 4 you’ll probably notice your baby’s improved hand-eye coordination, closer attention to the books you’re reading him/her, and the beginnings of understanding cause and effect. Your baby might even begin teething like Taylor did! As I write this, Taylor is in the tail end of her 4th month.

Here are the toys we added into the rotation this month that she has enjoyed playing with:

Lamaze Firefly Freddie (this is seriously the toy to replace all toys for her right now – it even has a teething piece attached! We hook this up to the center of her play mat and she goes to town !):

Sassy Rattling Ring (we dangle this from her play gym using a few of the rings for easier access. Also great for early teethers):

Sophie the Giraffe (another awesome teether, plus there are cute board books to go along with her!):

Ring stacker:

Well, there you have it – our list of developmentally appropriate, engaging toys that aren’t too tacky : )

Up next in my developmental toy “to-buy” queue are a Play Cube and Play Table. I have my eye on these:


What toys did your baby like best? Help me get ahead of the game – what toys did your baby and toddler really like from 4 months and older? Thank you!

xo, Ashley (1)

How To Be Confident In Your Postpartum Body

Postpartum Body Image

Have you lost all the weight you gained during pregnancy, or maybe none at all? Maybe you’ve even gained a few extra pounds? Is your skin looser, your belly softer? What about stretch marks? Are your muscles less defined? How about finding cellulite in places you don’t remember having it? Do you wake with heavy, dark-rimmed eyes from lack of sleep?

Well, I have something to tell you and I want you to really hear it – you are BEAUTIFUL.

Society puts so much expectation and value on “getting your body back” or keeping up with a certain standard of postpartum put-togetherness. But the truth is that your post baby body and self really is beautiful, in the very truest sense of the word.

When you get down onto the floor to play and interact with your little one even though your knees and back ache, you are beautiful.

When you wake in the middle of the night – eyes half closed in delirium – to nurse or warm a bottle for your sweet baby, you are beautiful.

When you hold your little one after they’ve fallen asleep until your arms ache and burn, just so you can savor the closeness for even a few minutes longer, you are beautiful.

When leggings are all that fits comfortably over your new, softer shape as you get ready in the morning for your 24/7 shift of mommyhood, you are beautiful.

When the muscle you worked so hard to build has dwindled away, but the extra hours you once spent lifting in the gym are now spent lifting and nurturing your babe, you are beautiful.

When you sacrifice your sleep, your time, your figure, your career, and even your sanity sometimes, all for the benefit of that precious gift you’ve been given, you are so very beautiful.

You held and sustained a life within you for 9+ months, and you give your all to nurture that same life now. Eventually the weight will come off, the bags under your eyes will lighten up as you’re able to get more sleep, the stretch marks will fade, and some day {when your little one isn’t so demanding} you’ll have the time to “get your body back” if you choose to. You may also decide that goal is not as important as you thought it would be, if at all.

You are a different woman now; you’ve changed from the inside out, just as your body has. You are more compassionate toward yourself and able to see more clearly what truly matters. You appreciate what your body was able to accomplish and are in love with the product of your labor, quite literally. Your priorities and perspectives have shifted and you know in your bones that you are beautiful just as you are, physical reminders and all. If you can’t feel this right now, allow yourself to start to. It’s the truth and a foundation for confidence worth cultivating.

You are beautiful, Mama. Believe it.

xo, Ashley (1)

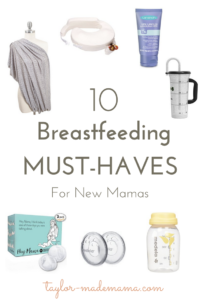
10 Breastfeeding Must-Haves For New Mamas

10 Breastfeeding MUST-HAVES For New Mamas

This page may contain affiliate links. Views are 100% mine.

First of all, let me start this post by saying that however you feed your baby – be it exclusively pumping, breast or bottle feeding – is awesome. I have no opinion on what is “best” and I don’t think that’s something for anyone to judge. I know many women who wanted to breastfeed their baby but couldn’t, and others who could have but chose not to. All of their babes are growing and thriving because they are being FED. So, to each mama their own!

If you are able and choose to breastfeed like I have, it really helps to know which of the MILLIONS of products out there are actually useful, since there are so many on the market.  The list below includes the exact items I have used, liked and had success with. Some of these items I also included on my baby registry essentials post as well. I hope this list is helpful to new mamas who are going the breastfeeding route!

1. Burp cloths

We use Gerber disposable cloth diapers in lieu of burp cloths. I swear at one point I had one of these hanging off every couch arm, chair and bedpost in our home. Taylor had reflux so we may have used more than the average family. I bought three pack of  10 which makes it so that I’m never without several on hand, even if I haven’t done laundry in a while. They are cheap, soft, super absorbent, and I don’t care if I have to throw one away occasionally. You can also place one under your baby’s head for side-lying nursing, so that you don’t get any spills from their little mouth onto your sheets! I think cloth diapers are a pretty good substitute for their oftentimes more expensive burp cloth counterparts, even though these are really, really cute!

2. Breastfeeding pillow

The designer of the My Brest Friend nursing pillow is seriously a genius. As a new mom, you and your baby both are trying to figure out this whole breastfeeding thing. It’s not easy by any means, so at least you can be as comfortable as possible during something you’ll spend A LOT of time doing in those first weeks and months. The adjustable, noiseless release {trust me, this comes in handy} buckle allows the pillow to wrap around you to provide nice lumbar support. Unlike a Boppy or other nursing pillow, the surface is very sturdy – I called it my baby tray – that your babe won’t sink down into which really helps you keep good posture.Lastly, the pocket is perfect for storing items you’ll want handy (i.e. TV remote, cell phone, baby nail clipper/file, nipple cream, natural hand sanitizer, mini lotion, etc.). I do recommend having an extra slipcover for it for when you have to change it due to the inevitable spit up, blow out, et. al. They even make a My Brest Friend for nursing twins!!

3. Bra pads

Protect your bras/camis {and your dignity if you’re leaving the house} by throwing a pair of these in. If you don’t, especially in the first few months of breastfeeding when leaks are bound to happen, the milk can leave stains on your clothes. It’s a good idea to keep a couple spares in your diaper bag and/or pump bag just in case you’re out and about and have forgotten to pop them in before leaving. These disposable nursing pads by Hey Mama are soft,absorbent, reasonably priced, and can we talk about the adorable packaging?  They also make a cute tin of all natural, nice-smelling nipple salve!

4. Breastmilk storage bags

I recommend these storage bags for any pumped breast milk you will not be feeding your baby right away. I store them in 2-3 oz increments and lay the bags flat in the freezer union they are frozen, which is a big space saver. When it’s time to use the milk, you can easily defrost it under some warm water, pour into the bottle and voila! These are great if you want to create a stash of your breastmilk for when you go back to work.

5. Nipple shields

These look a little bizarre when they’re in your bra, but I swear you will not regret having these for those first few weeks while your body is still getting used to breastfeeding. Trust me, having raw skin rubbing on the inside of your bra and shirt has to be one of the most uncomfortable feelings ever, and these were the only way I was able to alleviate that discomfort. Even if you only need to use them a couple weeks, they’re worth the small investment. I didn’t know about them until one of my best girlfriends clued me in, so I’m hoping I can pay that forward!

6. Lanolin Cream

That same girlfriend of mine once compared the feeling you have the first few weeks of nursing to a thousand fire ants. Need I say more?  The Lactation Consultant at the hospital gave me a sample tube of this Lansinoh cream and told me to use it before and after every feeding, which at the time I thought seemed unnecessary/overkill.Some women have better or worse experiences than I did, but all I can tell you is that using this cream before and after every nursing session was the only way I was able to persevere through the initial discomfort. Don’t get discouraged if it’s painful for several weeks – it was for me. Stick with it, because it truly does get better. If your pain seems greater than normal I would definitely suggest talking to a Lactation Consultant if you can, as soon as you can – they can help with latch and/or positioning issues that could make the difference.

7. Extra storage bottles

If you plan to pump, you will definitely need extra bottles to go with your pump. I store 4 empty Medela bottles/lids in my pump bag every day, as well as a couple extra lids just in case I forget. You can pop these in the freezer or transfer the pumped milk into storage bags. You can see the rest of what I pack in the pump bag I carry back and forth to work in this post.

8. Nursing Tanks/Bras

A nursing cami and yoga pants was my uniform for the first month after Taylor was born. It just makes life easier – who wants to fuss with anything else when you have a hungry, screaming newborn in your arms?

There are so many out there but here are the tanks, bras and sports bras I actually like that have held up to many, many wears and washings. The Cake bras are by far the most comfortable, in my opinion : )

{I bought some cheapy ones early on but they were not supportive or functional enough. It’s worth the investment, especially if you plan to nurse for a while}:

9. Nursing cover/scarf

There are all different styles to choose from, many of which can be disguised as just another part of your outfit. I have several different nursing covers; I store one in my pump bag, one in my diaper bag and one in my car just in case.  I love wearing my black infinite nursing scarf for travel days – super convenient. And, hey, if you don’t want to cover up at all then don’t. I’m all for normalizing breastfeeding in public if that’s your comfort level!

Below are 4 different styles to consider:

10. Water bottle

Last but not least, a good water bottle WITH a straw. One of the most important things you need to do while you’re breastfeeding is to stay hydrated!  You will be especially thirsty in the first few weeks as your supply is coming in. If you become dehydrated, your supply may dry up as well.  So yeah, water {and lots of it!} is pretty darn important. Just when you thought you’d get a break from the pregnancy induced 20 bathroom trips a day…. The straw piece just makes it easier to hands-free, lean over and sip on while nursing or especially if you have to pump (i.e. when/if you return to work.). I have two of these, and plan to order two more to keep at work so I can cut down on one thing to schlep back and forth.

There are my top 10 breastfeeding must-haves for new mamas! Enjoy the special bonding time of feeding your babe, however you choose to : )

xo, Ashley (1)

5 Tips To Survive Your First Weeks Home With Baby

This page contains affiliate links for your convenience. Views are 100% mine. If you make a purchase through a link, Thank you!

Before giving birth to my daughter, Taylor, I thought I was equipped for our first weeks home together. My husband and I had her nursery furniture all arranged, I’d washed and put away the tiny clothing and accessories, stocked up on diapers/wipes/etc, and had the carseat installed. I thought I was ready to rock….

IMG_2018

All of the aforementioned certainly helped me feel like less of a chaotic mess, but looking back now, boy was I in for a big awakening those first days/weeks! There truly is no way to prepare for the new skills you’ll need to instantaneously acquire once your baby arrives: soothing them when they cry, surviving on minimal (or no) sleep, breastfeeding/pumping/bottle-feeding, keeping up with your own health whilst giving 110% to your baby, etc.

In the hopes of helping other new mamas navigate those first few weeks with your new bundle of joy, I’d like to share five of my new mama survival tips:

1. Take care of yourself, please –

Get enough to eat and drink. Keep snacks and a water bottle (I highly suggest a big one with a straw like this one that I have two of) next to where you nurse since you’ll be there pretty much around the clock. I can’t stop eating these protein bars. Seriously addicting.

IMG_1868

We actually utilized a meal delivery service for the first several months we had Taylor to supplement cooking, and were also blessed with parents and friends who brought us tons of fresh and frozen meals that lasted for weeks. Instacart is a grocery delivery service that can be lifesaving as well – I know I did NOT feel like going grocery shopping for quite some time, and they’ll shop for you and deliver to your door for a fee – perhaps not something you’d continue on with forever, but definitely helpful in the first weeks with a baby. If there is a Door Dash food delivery service in your local area, I would also recommend signing up for it -For a small delivery fee, you can have your favorite local restaurant’s food delivered right to your door. When I come home at the end of a particularly tough or long workday, the last thing I want to do is cook and clean up a meal. Those are the nights I hop on the Door Dash app (sometimes even on the way home at a stop light – eek), order a local favorite for my hubby and I, then get on to playing with my baby girl for the couple precious hours I have with her before she falls asleep! I’m so glad I found out about this service. Lastly, I know isn’t a “green” choice, but having a stack of paper plates (100 for only $13 HERE) for those first weeks saves you dish washing time. Any ways to make your life easier during those tough first weeks help!

Lastly, when you’re physically up for it, get outside for a walk . I can’t tell you how helpful it was to take daily walks, even if it was only around the block once or twice the first couple of weeks. You can progressively walk for longer stretches and you’ll be logging the miles [and shedding those preggo pounds] before you know it.

2. “Sleep when the baby sleeps” –

Everyone told me this, and I didn’t listen until I started feeling like I was losing my mind from exhaustion! Seriously, leave the laundry and TAKE A NAP.  Don’t stay up to get in alone time, even though you’ll want that too. Those things can wait a couple weeks. Elicit help from your partner, friends and family so that you can get some sleep. Your sleep is SO critical to being that best mama you can be! Another suggestion is to pump so someone else can bottle feed in the middle of the night every once in a while – it’s amazing how great you feel when you get even a 4-5 hour stretch of sleep in those first weeks!

3. Make friends with dry shampoo –

Maybe I’m the only one, but I think I only took a shower including washing/conditioning my hair 3 times in the first few weeks. Slightly hobo status, but between using nap time for a shower or sleep, I chose SLEEP! This brand is my favorite  for keeping your hair looking fresh(er) when you don’t have time for a shower. This is also a great, less pricey option that works well too.

4. Maintain good posture –

All the bending and slouching can really do a number on your back. I know you’ll be thinking of your baby’s needs before your own, but trust me – you need to be preventative with this so that you can continue to give your all to your babe. Invest in  a good nursing pillow like the My Brest Friend (my fav which I talked about HERE) and be cognizant of bending at the knees to pick things up, tightening your core when you lift baby off the changing table or out of the crib, or slouching, etc.

5. Soothing the baby tool kit –

This was probably the most difficult thing to figure out, and every baby is so different, but here are a few of the ways we were able to successfully soothe Taylor when she cried or need to go down for a nap/the night:

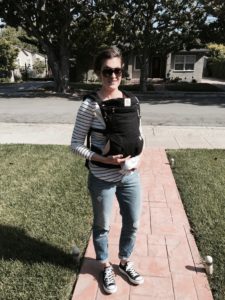
  • Taking walks with her in the Ergobaby Carrier with the Infant Insert – maybe it was all the running/exercise I did whilst preggo, but the girl LOVES her some motion!

IMG_9437

    • Bouncing on a yoga ball – this in combination with patting her bottom if she was really upset was a sure fire way to soothe her and even get her to fall asleep. Similar to rocking, but for Taylor, much more effective. Plus, you can actually travel with a deflated yoga ball/manual pump if needed.
    • Swaddling – I thought Taylor hated swaddling, so I let her be “free” for the first 5 weeks of her life. And guess what? Neither of us slept longer than 1.5 hours that entire time, UNTIL I tried out the swaddle again and low and behold she start sleeping 6-8 hours at a stretch at night and the 20-30 minute crap naps extended to 50-90 minutes! Give swaddling a try – I am lazy and uncoordinated so I use the cheater’s swaddle (Halo Sleepsack Swaddle) Taylor has two at home, and one at daycare, and I swear this is the single best thing for calming her down and readying her for sleep now [4 months old at the time I write this].

  • “Shhhing/Patting” – this is the latest way we’ve been able to soothe Taylor and get her to fall asleep without the need for motion (rocking, bouncing, walking, etc). It’s really been a game changer. Read more about the method in the book, which is now my baby bible, The Baby Whisperer.

I’m still a total amateur mommy and every baby is different, but hopefully there is one little nugget you can use or share with another new mama! If you have any questions please email me at ashley@taylor-mademama.com. I’d love to help new mamas in anyway I can!

What other ways did you or are you surviving the first several weeks with a newborn?

xo, Ashley (1)

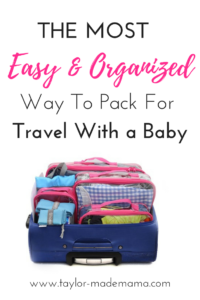
How To Pack For Travel With a Baby (featuring EZPacking)

 Packing for Travel with a Baby (2)
Last weekend AJ and I took Taylor down to San Diego for a 4 day mini-vacation, her first ever trip away from home. We attended the beautiful, heartfelt wedding of some of our very best friends – AJ was actually the officiant! My parents graciously flew down so that we could attend the wedding and related festivities, and I know Taylor had a blast spending special time with her Grammy and Grandad. It was a fantastic trip and Taylor, per usual, was a rockstar!
I have to admit that I was pretty nervous about the whole traveling with an infant process beforehand: from how to pack all the things she needs day to day, to hauling around all our baby gear, to how she’d sleep in an unfamiliar hotel room, and how on earth to pack all of her things in my suitcase in a way that wouldn’t be a complete mess.
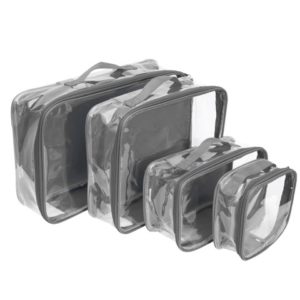
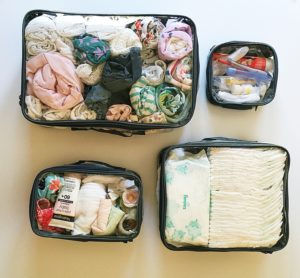
I want to share a product I found that made the process of packing and accessing Taylor’s things SO much more organized and enjoyable – EZ PACKING CUBES. These packing cubes made packing all the many baby things and accessing them upon arriving at our destination so simple (hence the” EZ”!).
 I purchased the Starter Set, which is one cube in each of the four sizes. The company was gracious enough to also send me a laundry bag to go with the set which ended up being crucial for all those dirty onesies and burp cloths throughout the weekend!

9 (3)

Here are 4 reasons why I’ll never pack without the EZPacking cubes again:

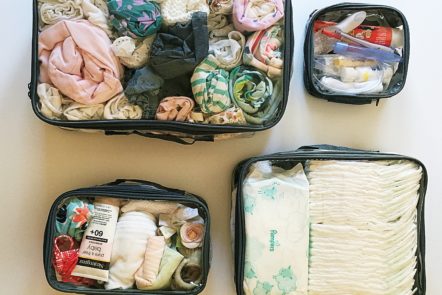
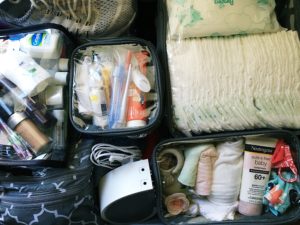
  1. They are transparent. I was able to easily find the things that I packed for Taylor and keep everything organized as I didn’t have to rumple through all her clothing looking for a particular item.

IMG_4063

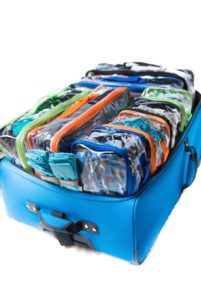
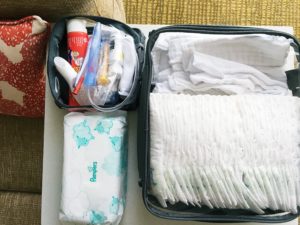
2. The cubes can be packed to utilize the entire height of the suitcase – so, no wasted space! I was able to pack ALL of my things + Taylor’s easily, as you can see here:

IMG_4065

3. They come in several different colors (black, green, pink, blue and gray), which would be perfect for mamas packing for more than one little and sharing a suitcase. If/when we have another addition to the family, I know this will make packing for/vacationing with two so much easier. Seriously, an organized mama’s dream:
4 colors 4. 
I was able to quickly set up an organized, little makeshift changing station in our room, then pack it and all her other cubes up in about a minute when it was time to leave:

IMG_4066

Mamas, seriously these are well worth the investment. I only wish I’d bought a second set up front.

 EZPacking has kindly extended a discount for my readers.  Enter code: “TAYLORMADEMAMA15t” at checkout for a 15% discount!

Here are a few other photos from our first family vacation:

IMG_4167
Daddy & T enjoying the view.
IMG_4297
My best girl.

Taylor’s moccasins: Freshly Picked


ALL the gear.
ALL the gear.

xo, Ashley (1)

Packing a Daycare Bag – For an Infant

Daycare bag contents

This page contains affiliate links for your convenience. Views are 100% mine.

I’m back at work now, fortunately only part time this year. 1-2 days per week Taylor attends a wonderful daycare/infant center right down the street. Do I wish I was with her instead? Yes, with all my heart. Do I feel confident that she is getting good care, socializing and developing without me a couple days per week? Absolutely. They do tons of developmental activities, she has an assigned “caregiver” who feeds her and puts her down for naps, and she gets a chance to socialize with the other infants which is nice for Taylor since she doesn’t [yet] have a sibling around. The other days she is with my mom, her Grammy, and my husband who works from home – huge blessings for our family.

Nowadays I feel like a total bag lady – my diaper bag, pumping bag, gym bag and now a daycare bag all have to be organized and prepared for each day before leaving the house. I posted about what I pack in my pumping bag HERE. I always make sure everything is ready to rock before I go to bed at night – if I leave that until the morning it’s highly likely I’ll forget something. If your mornings are anything like mine, there is way too much going on to with too little time to be sure everything makes it in the bag and out the door.

If you’re a new mom with a baby who will be in day care for part or all of the work week, I hope this post gives you some ideas for packing up your own bag before heading back to work.

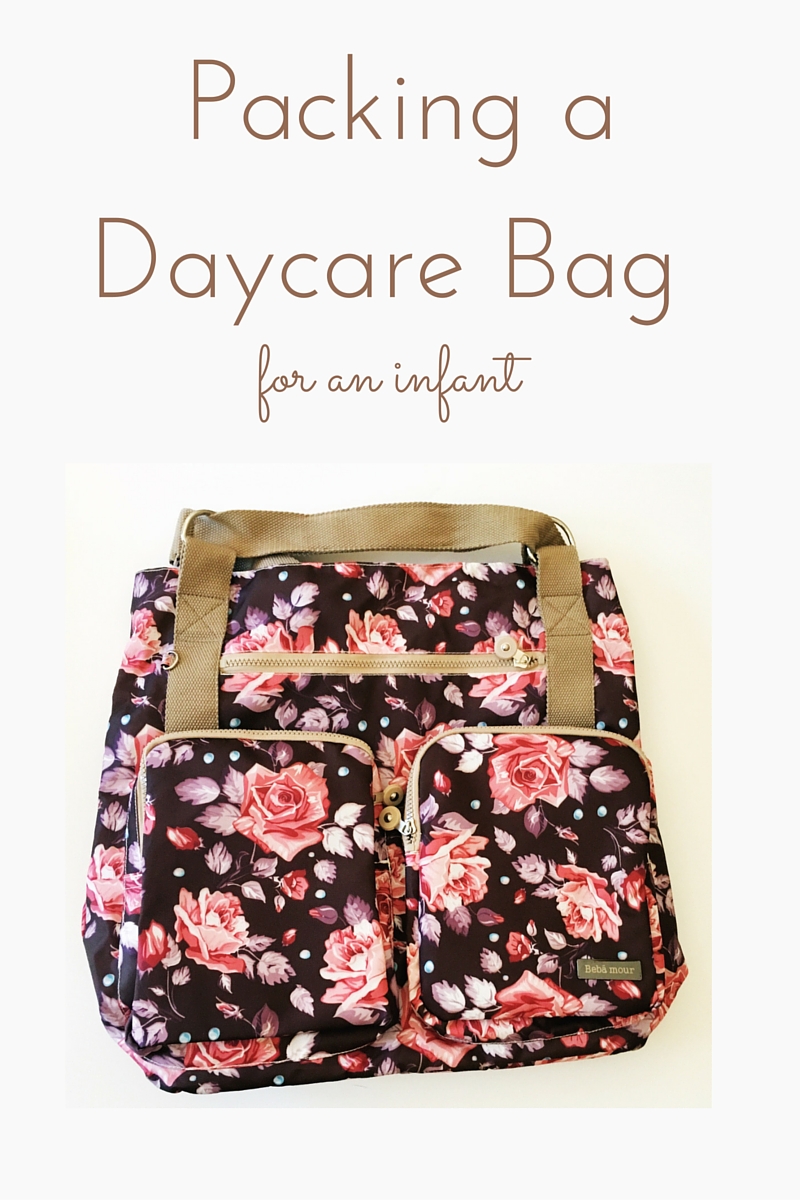
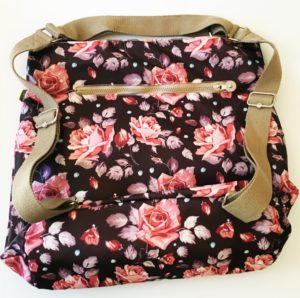
A lot of the bags I looked at for Taylor’s daycare bag [like this one from Skip Hop which was a good price point] didn’t have quite the dimensions I needed to fit her milk cooler in the bottom. I purchased this bag by Bebamour because it a) had TONS of pockets and storage space, b) could be worn as a backpack [essential for getting out of the house with all those bags AND a baby/carseat!], c) a very reasonable price for the quality, and d) almost exactly the right amount of room to fit the cooler for her milk in the bottom. Plus, I think it’s super cute:

IMG_3505IMG_3504

Now, on to the contents of Taylor’s daycare backpack:

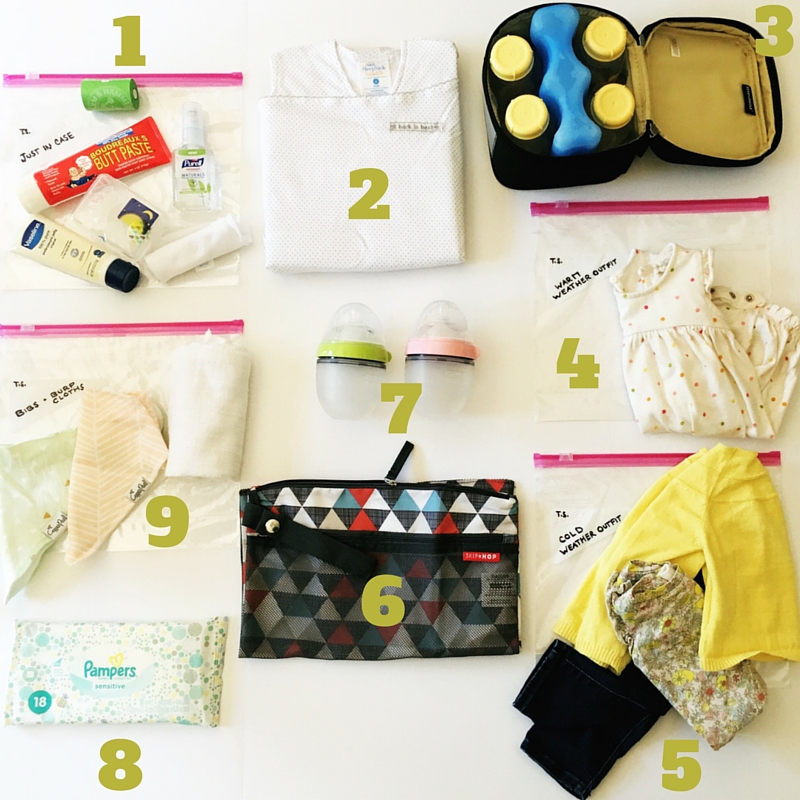
Daycare bag contents

1.The “Just In Case” gallon ziplock bag:

In this Ziplock I have a tube of Vaseline, MAM pacifiers [the only kind she’ll occasionally take], butt paste [this smells INFINITELY better than Desitin, IMO], mini hand sanitizer [I buy these in bulk and stash them everywhere] and disposable diaper bags.

2. SleepSack Swaddle

3. Bottles of milk and cooler

4. Warm weather spare outfit in a Ziplock

5. Cold weather spare outfit in a Ziplock

6. Wet/dry bag for bottles or clothes with spit up on them [darn you acid reflux!]

7. Comotomo Bottles:

We tried several different kinds of bottles, and this is the one Taylor took to consistently. The other brands that were recommended for breastfed babies may work for your babe, so I’ll link them here in case you need reference: Tommee Tippee, Lansinoh mOmma and Breastflow.

8. Wipes

9. Bibs [I adore these by Copper Pearl] & burp cloths [we use cloth diapers because they’re cheap and very absorbent!]

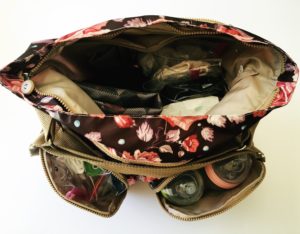
How does it all fit? Well, it was hard to get a good shot but you can hopefully see that I put the empty bottles in the front compartment [when I pick up Taylor + bag, the bottles are in the wet part of the wet/dry bag], the “Just In Case” ziplock is in the other front pocket, the cooler sits at the bottom, and all the other compressed ziplock bags +swaddle + wipes are in a stack turned sideways to the tight side of the bag. The wet/dry bag is wedged between the cooler and the side of the bag for easy access.

IMG_3515

That’s about it! If you’re sending your babe off to daycare for the first time like I am, I hope you both have a smooth transition.

Am I missing anything I could add to make my/Taylor’s life more organized? 

xo, Ashley (1)

If you liked this post, check out other posts in this series:

Working Mama’s Pumping Bag

Working Mama's Pumping Bag (1)

This page may contain affiliate links. Views are 100% mine.

T minus 5 days until the bliss that is Maternity Leave ends, and I return to work. True to the OCD that is within, all my bags are packed and ready to go: gym, daycare, meals, work/computer, and the subject of today’s post – the Pumping Bag! I’m a complete amateur at this working mama thing, so preparing ahead of time makes me feel more confident about the transition back.

IMG_2935
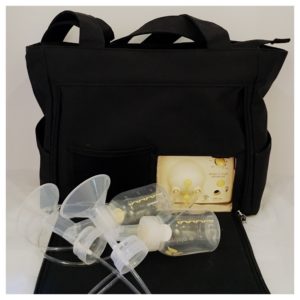
Medela Pump in Style Advanced Breast Pump with On the Go Tote

These days, most insurance covers a free breast pump. I chose to purchase my own because I wanted to have it from day one after Taylor’s birth, in case I needed it. Also, I liked the Medela Pump in Style Advanced Breast Pump {not the one covered by my insurance} because it included a spacious tote that was also conspicuous enough for me to bring anywhere I needed to. It has a nice amount of space to store all the gear I need:

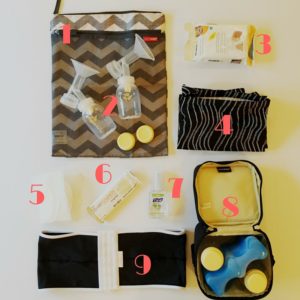
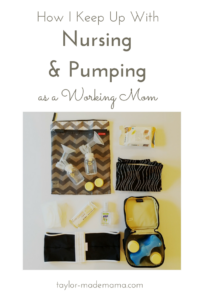
pumping bag contents
The contents of my Pumping Bag.

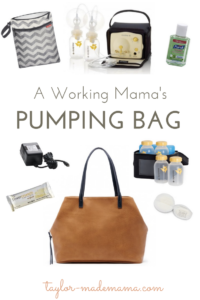
1.Wet/Dry Bag: These bags are uber convenient. I also have one for my daycare and diaper bags as well.

2. Extra Pump Parts: I bought an extra set of pump parts so that I don’t have to necessarily wash the parts after each pump. I can just put the used set in the Wet/Dry bag to wash when I get home and use my second set for the next pumping session at work. I also keep two extra bottle lids and filters in the dry pouch.

3. Breast Pump & Accessory Wipes: This is another convenient way to keep everything clean and sanitary, without having access to a sink when you’re on the go. If I’m not on the go, and at my office, I’ll wipe off my pump parts before putting them in the wet/dry bag and put the bag in the refrigerator to keep it sanitary until the next pump. At night, I wash everything with soap and warm water at home.

4. Nursing Cover: In case I need to pump in my car or other non-private location.

5. Disposable Nursing Bra Pads: Because, leaks.

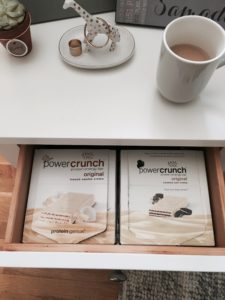
6. Snacks! – Power Crunch Protein Energy Bar: These protein bars are seriously delish – they have tons of flavor options and taste just like a wafer cookie, I swear.

7. Mini hand sanitizer – I like this alcohol free version.

8. Cooler and extra bottles

9. Hands-free pumping bra: This is an absolute must have item. I can still work on my laptop or make phone calls, while taking care of my other business : )

UPDATED 8/27/2016:

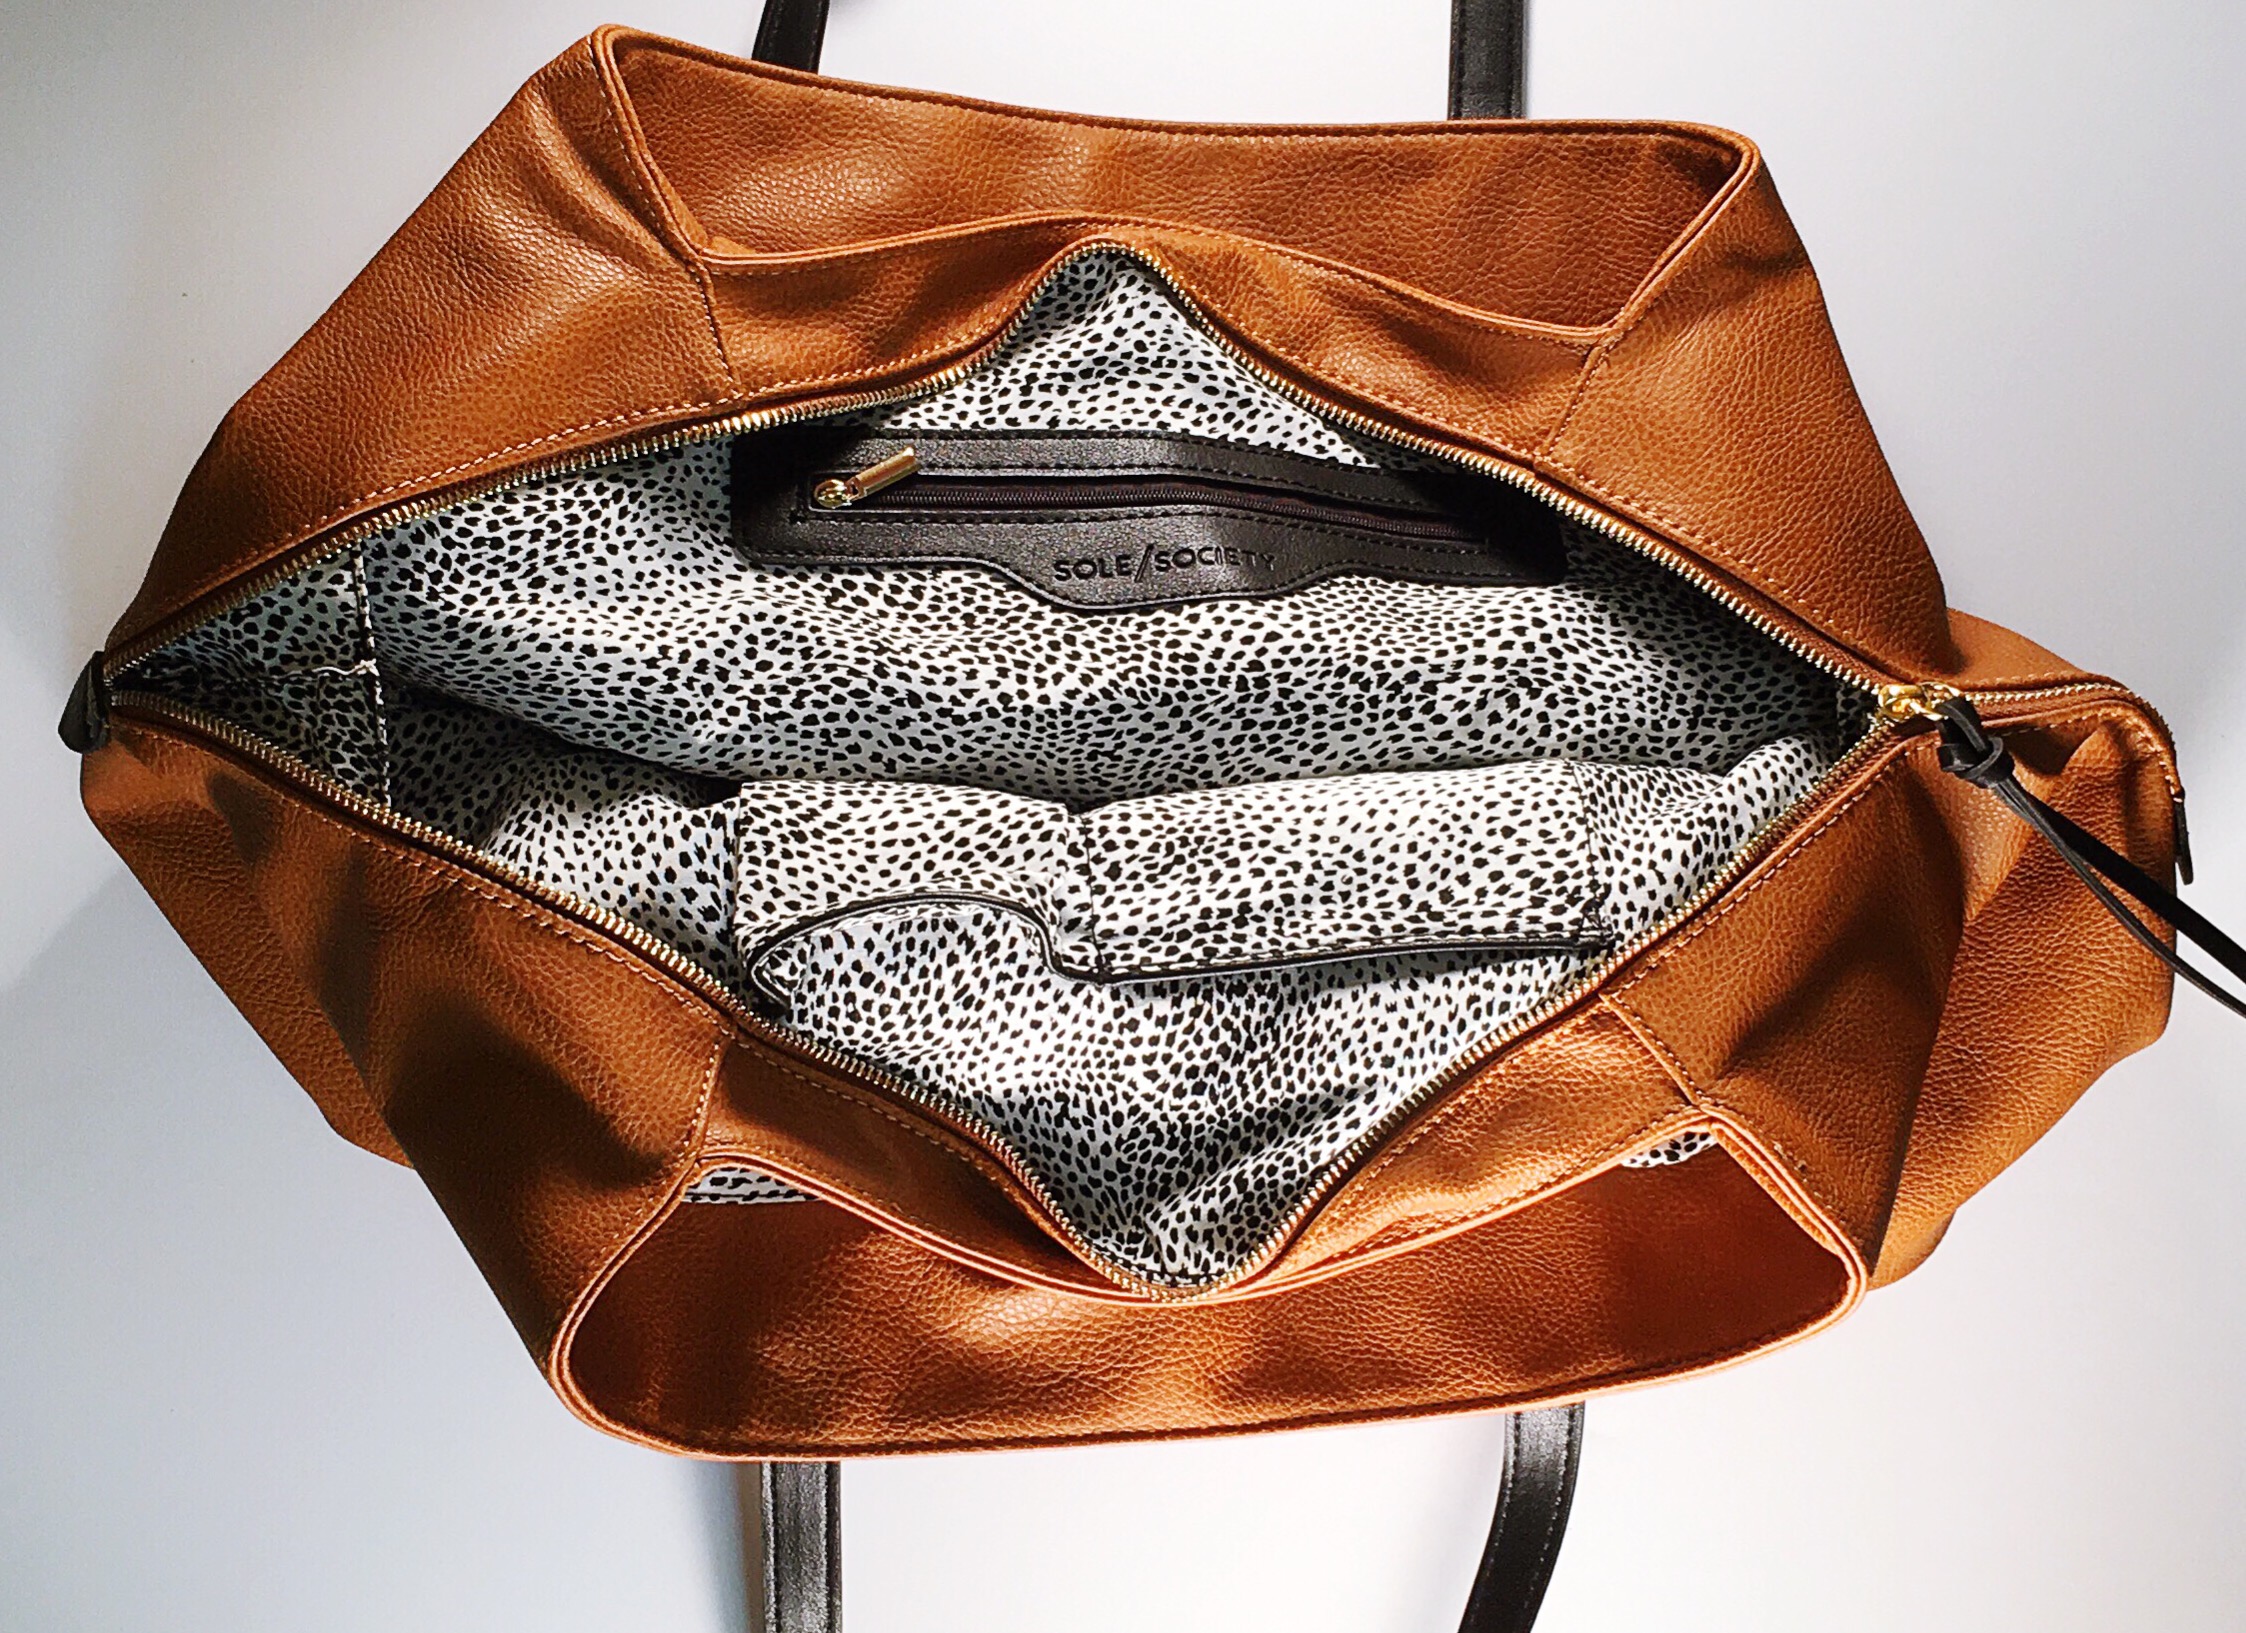
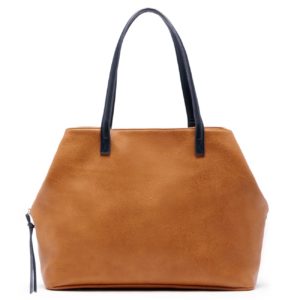
After being back at work for a month, and temporarily not having a private office to take care of business, I decided to transfer all the contents of my Medela tote {see above} into a larger, more inconspicuous, purse-looking bag. As I move throughout the office to whichever destination I end up in for the particular pumping session, no one is the wiser that I’m not just carrying a purse.  I found the perfect one by Sole Society:

I also came up with another time saver {and reason for needing a larger bag!}. I now store my pump parts in this Skip Hop cooler in between sessions, essentially utilizing it as a mini fridge. This saves me from needing to wipe down and sanitize in between pumpings!

I hope that this post was helpful for any nursing mamas preparing to head back to work, or gave ideas to add convenience for those who already have returned!

What do you pack in your pump bag? I can’t be the only perma-hungry nursing mama out there – what are your favorite healthy, go-to snacks?

xo, Ashley (1)

P.S. If you’re still nursing, make sure to check out all my posts on breastfeeding & pumping.

PS The tote I use for my pumping bag is this one by Sole Society, but here are several others that would be super cute:

Working Mama’s Workday Routine – Pumping & Breastfeeding

A sample schedule of a working mom who pumps at work in order to maintain a breastfeeding relationship with her baby.

I’ll say up front that I’m pretty much OCD when it comes to organization  [e.g. I make crazy timelines and spreadsheets for things that don’t require them]. Organization is a large part of what makes me good at my job, and most of what drives me crazy about myself because my wheels never stop turning. So, naturally, I’ve outlined a routine for work days in order to feel more confident about returning in a week [waaaaaa!] and making sure Taylor is set up for success when I’m away from her.

Figuring out how to pump & breastfeed while working is going to be a challenge, but it’s something that I really want to continue to do for my daughter. I’m incredibly fortunate to have the opportunity to go back to work on a part time basis for this first year as a transition, have a hubby who works from home, and also to have the help of my Mom {Grammy} who will watch Taylor two days of the week. Anyway, I hope my OCD-ness can help my fellow working mamas navigate your returns to work, whether you are pumping/breastfeeding or using formula to feed your babe.

I utilized the sample “Baby Sleep and Feeding Schedules” from Baby Center. There are schedules for 1-12-month-olds with stay-at-home or working moms who either exclusively breastfeed, exclusively pump or formula feed. If you’re looking for something like I made below, this is a great resource!

IMG_4982
My pumping bag, believe it or not.

Here is the approximate schedule we’ll keep for workdays:

Workday Routine: Breast-feeding + Pumping Mama of a 3.5 Month Old

4:00 a.m.: Nurse, put the baby back down to sleep, leave the monitor with hubby, pump, then get ready for the gym.

4:30 a.m.: Mama gets in her workout at the gym or out in the garage. Or, work on blog stuff.

6:00 a.m.: Mama starts a load of laundry, showers and gets ready for work.

6:30 a.m.: Baby girl wakes up and watches her mobile until Mama is finished getting dressed and readying bottles for daycare or Grammy.

A sample schedule of a working mom who pumps at work in order to maintain a breastfeeding relationship with her baby.

7:00 a.m.: Nurse.

7:20 a.m.: Out the door to drop baby off at daycare by 7:30 and/or head to work if Grammy is coming.

8:30 to 9:45 a.m.: Baby [hopefully] naps.

9:45 a.m.: Baby eats 4-5 ounces breast milk. Mama pumps at work around this time.

IMG_4717
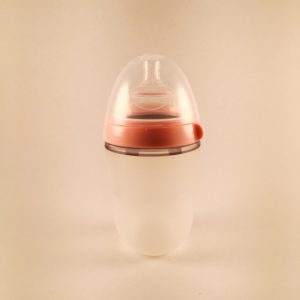
Comotomo – a great bottle for breastfed babes

11:30 a.m. to 12:30 p.m.: Baby [hopefully] naps.

12:30  p.m.:  Baby nurses or eats 4-5 ounces breast milk. Mama pumps at work during lunch or goes to daycare/home to nurse.

2:00 to 3:00 p.m: Baby [hopefully] naps.

3:00 p.m.: Baby eats 4-5 ounces breast milk. Mama pumps at work, if possible.

If I could go back and do it again, I’d snag this tote for my pumping bag/purse. Click on image to shop!

5:30 p.m.: Mama picks up baby at daycare or returns home if Daddy got her earlier.

5:45 p.m.: Home, nurse.

6:00 p.m.: Put pumped milk in fridge, freeze any extra milk. Baby takes a catnap or has playtime with Daddy.

6:45 p.m.: Start bedtime routine – bath, change into overnight diaper & pj’s, read a book, swaddle, sing Good Night song.

7:00 p.m.: Nurse. Baby falls asleep nursing or needs bouncing on the yoga ball [unless we decide on some type of sleep training, at which point we would put her down drowsy but awake to fall asleep on her own, I think!]

7:30 p.m.: Baby [hopefully] asleep by this time.

7:30 to 9:30 p.m.: Mama prepares pump bag/daycare bag/bottles and lunch for the next day, lays out workout & work clothes, and folds dry laundry [thanks Hubby!]. Reheat prepped food [Sunday/Tuesday], order in or crockpot for dinner. QT with Hubby.

10:00 p.m.: Bedtime

4:00 a.m.: Wake, nurse, baby goes right back to bed. Start all over again : )

You can see exactly what I pack in my pumping bag and how I pack it in this post.

Working Mamas, I want to know – how do you structure your week days? How do you get in your ‘me time’ and maintain balance?

xo, Ashley (1)

Other Taylor-made Mama posts you may be interested in:

A sample schedule of a working mom who pumps at work in order to maintain a breastfeeding relationship with her baby.

Helping Your Baby Get Through Vaccinations

Before Taylor’s 2 month check up, I posted the photo below and the question, “Little miss is getting her shots today…what advice do you have for getting through this with as little pain/tears as possible?”.

img_2526.jpg
Poor little cutie had no idea….

I was absolutely overwhelmed by the quantity and quality of responses I received from my fellow mamas, and wanted to share all of their input on this forum so that other new mamas can benefit. Whether or not you choose to vaccinate is a very personal decision. If you do decide to vaccinate, hopefully the advice below will help you know what to expect and give you ideas for how to navigate the experience, as it did for me.

Wear her in a baby carrier… I did that and it worked great.
Lots of snuggles afterward, and nurse her right after too! The pain and crying is inevitable, but you can soothe her pretty quickly. [My daughter] cried hard for 1-2 minutes, but then it was all over.
Boob or bottle right after.
Our pediatrician always has me hold her when she gets her shots. But the crying only lasts for about 2 minutes. As soon as it’s done and the nurse is gone then she’s over it. But I would definitely recommend having the bottle ready or nurse her if she doesn’t stop crying.
It’ll be over quick! Lots of cuddles and nursing should help.
Massage the shot site. It’s harder for mom than it is for baby.
Shots weren’t as bad as I thought they’d be. I have one twin that handles them like a champ & one that cries pretty hard at first but lots of cuddles & kisses later & he’s ok. I do notice a mild fever afterwards for a day or so. I cried too, so the snuggles afterwards is good for both of you.  Luckily the shot site doesn’t hurt for too long afterwards. Also, take the band aids off during bath time so the adhesive isn’t so sticky.
You will definitely hurt more than she will!!
I always held her. And I also gave Tylenol before the appointment so it was in her system when the shots were given. They recommended I do that. It’s hard! I think it hurts mommy more than baby!
Both my kiddos reacted to shots with a slight fever and sleepiness when they were babies. They napped extra long and it freaked me out!! But – it’s totally normal. I think pre-shot Tylenol is a great idea! I never did that. I called the advice nurse with [my son] since I was freaked and she calmed me down. It’s not necessarily common but it can happen! The sleepiness and irritability though is pretty common though. I remember a friend’s baby took a 5 hour nap afterward!
Yes Tylenol before or right when you get home (doctor’s office should have a dosage chart based on her weight). She’ll only cry for a minute. [My daughter] was just sore and crabby the next day (no Tylenol). At her next appointment, I gave Tylenol when I got home, she was completely normal (no soreness or crabbiness!). Keep in mind that a few minutes of crying (or even a day of crabbiness) is WAAAAY better than her getting any of the diseases she’s being vaccinated for!!
Best of luck to you momma, I think it’s just as hard or harder on us. Just FYI. She may sleep a lot after, at least my little one does. None of us know until we do, it’s great to see you have a wonderful support group. Most of all, trust your instincts and know you are an amazing momma.
Epsom salt baths afterwards to pull out the toxins that are in shots. And I’ve read that aspirin or Tylenol can actually increase the bad reaction to vaccines, so I’d google that before doing it. Also, I highly highly recommend a delayed schedule. We were only given 1/4 of the vaccines they give babies now.And hey, keep in mind, you’re her mama. If you feel uneasy about something and the doctor’s are pressuring you, go with your gut. Mamas have intuition and know their babes. I’ve been kicked out of my fair share of doctor’s offices, but I do what I feel is best for my babies, and you should too.
There were a few shots I waited on giving.  We gave them eventually but not in batches like some recommend.  The flu and Chicken pox we waited on since they aren’t viruses that are deadly if the happen to get them.  I just made sure they got the chicken pox vaccine before they started school.  But yes, discuss delayed vaccinations.  4 at a time always seemed a little extreme.
I always have my kids some Tylenol before to help with the pain after.  Then right after shots I’d nurse to help them get their mind off it. See if the nurse can have all shots prepped and ready and do them quickly after each other so there is very little wait time in between.
Tequila for you!
You are going to cry too! Nap when she does today.
Lots of cuddling and feeding her right after helps!
Daddy was contracted for shot day. Couldn’t do it myself, I would snap at the nurse.
I cried when both of my kids got their 2 month shots, I agree with several previous post: hold her, Tylenol  for her and just have an eye on her temp and never hesitate to call the doctor if you feel something is not right.
You can hold her while she’s getting the shot which will comfort her. Did that until [my son was 2. In addition we spread out his shots so he didn’t get four, but only two in one session. Dr Sears has great sample schedules on that.
Tylenol every 4 – 6 hours.
Nurse her as soon as you can, if you’re breastfeeding. Otherwise, it will be over fast.
A little Tylenol before the appointment and nurse as soon as the shots are done. My pediatrician just let me sit in the exam room until I was done nursing so I’m sure they make accommodation and allot time for that, so don’t feel stressed about taking up time in the room. She’ll be fine! It’s tough to watch them scream, but she’ll be okay.
If she won’t nurse after, wrap her up! That worked like a charm for us.
Breastfeeding after helped so much! He was calm in a few minutes and then he was good the rest of the day. He never did get a fever either.
It’ll only hurt for a little bit – she’ll be fine. But definitely big hugs and lots of kisses right after.
Make sure to check with your doctor before giving any meds (over the counter or prescription) rather than searching the interwebs or taking advice from friends. Ditto for concerns about vaccine schedules, possible reactions etc. Your baby’s doctor went to school for a LONG TIME, attends continuing education to remain current on medical best practices, and cares deeply about his/her patients. If you don’t trust your doctor to make the best recommendations for your baby (including addressing concerns!), consider finding a new doctor. Just some thoughts from a medical professional.
Sooooo, honestly, the shots were actually harder on her than I even anticipated [i.e. not breathing for several seconds, maroon face + head from crying so hard, unable to nurse, etc.] but I was able to stay strong and comfort her. Luckily my mom was able to accompany us, which also gave me extra strength. The nurse gave her three separate shots, which I thought was almost cruel – next time I think I’ll ask that at least two be given at once if possible. I chose to start nursing her before the shots were even given, but that didn’t seem to help distract her from the pain/surprise.  Even though my super sensitive little babe had a tough time, these words brought me a lot of comfort going in; I felt prepared for what was to come and how to handle it. Had I been as nervous as I was prior to reaching out and receiving the advice of these women, I’m sure she would have felt that and she would have been even more upset. And, everyone was right – she took an epic 5 hour nap in her DockATot. I felt like she was a little “off” when she woke up from the nap, and was definitely fussy, so I gave her some Infant Tylenol. But, after sleeping through the night, she woke up with a smile on her face and without fever. It truly takes a village, and I’m so thankful for mine and the advisement they gave in this situation.
img_2528.jpg
5 hour post-vacc nap!
I hope you’ll continue to be a part of my “village” here where we can share with and encourage one another as we journey through motherhood.

How did your babe’s vaccinations go? How did you get them and yourself through it?

xo, Ashley (1)

A Lesson On Letting Go Of Control

letting go of control quoteTruth time guys…Although I’m working around it, I’ve honestly been SUPER pretty frustrated that my postpartum recovery hasn’t been what I planned for it to be. This whole Pubic Symphysis Disfunction business completely derailed my schedule and method for getting back into shape and being able to do things I love in and out of the gym – things I worked hard throughout pregnancy to be able to jump back into quickly and easily postpartum. I felt assured that my plan would work and I would “bounce” right back. My labor and delivery were also NOTHING like what I planned, but that’s a whole other post…
It has always been challenging for me to be out of control of an element of my life, and to LET GO/ not over analyze when things don’t work out as I expected/hoped they would.  I’ve realized for some time that this is not a productive use of heart + brain space, but I have the strong sense that NOW is the time to learn how to really let go of the desire for control and be at peace, humbly grateful, no matter the circumstance. Because -WOW – I have so much to be grateful for, and there is ALWAYS a way to adapt and still achieve my goals.

I’m so thankful to my sweet daughter – from her very birth, she is already helping me grow and evolve closer to the example I hope to be for her in this life. 
I know I’m not alone in the ongoing quest to refine and become the best version of myself.  Today, let’s let go of what we can’t control and do what we CAN to take the best care of ourselves and our little ones.
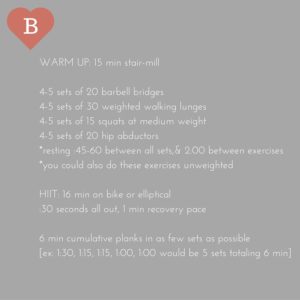
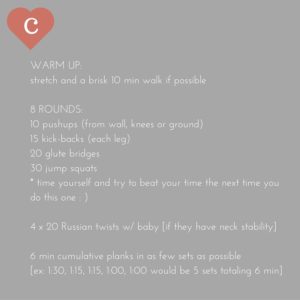
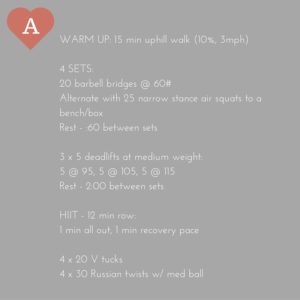
Below are three different workouts for you, targeting the same muscle group and taking about 50 minutes:

A] what I did at the gym
B] what I would have done at the gym if I was cleared to : )
C] an at home option.
Workout A
Workout B
Workout C
If you try any or all of these workouts out, let me know how they go! Go Mama!
xo, Ashley (1)