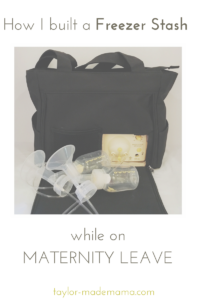
Building A Breast Milk Freezer Stash On Maternity Leave

how-i-built-a-freezer-stash-while-on-maternity-leave

This post contains affiliate links for your convenience. View are 100% mine and I use all products referenced.

At my daughter’s two month check up, her Pediatrician asked if I had started working on a “freezer stash” to prepare for my return to work and the inevitable dip in my milk supply that would go along with it. I thought, ‘ummmm what the heck is a “freezer stash”?’ but replied, “no not yet, but I will soon.” I knew going back to work in 7 weeks would be an emotional rollercoaster anyway, but I hadn’t yet begun to worry about how to mitigate a potential dip in my supply when I initially returned. I have a goal of breastfeeding Taylor for her first year of life, and I didn’t want those first few days back to work to sabotage that goal. The minute I got home I commenced a frantic Pinterest search for how to create a back stock of breast milk while I still had time on maternity leave. My worry fueled me to make the time for and routine to create a freezer stash over the next 40 days or so and, little by little, I ended up with just shy of 100 ounces by the time I went back to work.

I’m so glad that I took that time, even though pumping when you’re home with your baby is super annoying (my hat is off to you if you’re an exclusive pumping mama!), because it alleviated the pressure to pump enough when I first returned to work – that transition was stressful enough already! Fortunately, with the help of my AMAZING and delicious lactation cookies I have been able to keep up with Taylor’s demands thus far, but the stash has come in handy for other reasons I hadn’t thought of:

  1. when my husband and I have gone on a date night a couple of times and my mom has watched her. For me, it’s nice to have that freedom every once in a while.
  2. my hubby has fed her a bottle of my milk at 3AM and so that I could get a full night’s sleep when I was on the edge of total exhaustion during the 4 month sleep regression
  3. to mix in with the homemade baby food I’ve been preparing. I’m only able to pump just enough for the next day at work.
  4. when Taylor had a particularly hungry day and my mom, who is a saint and watches her when I’m at work now that she is no longer at daycare, needed to give her an extra bottle beyond what I’d pumped the day before at work. I’m definitely a “just enough” pumper!

You can read more about my workday pumping routine here, and what I pack in my pumping bag here.

I’m not an expert, but if you are going to be returning back to work soon, I hope some of my experience and resulting advice will help you build up your own freezer stash and have the comfort of knowing you’ve got a backup while you’re getting back into your work routine. We mamas have enough to worry about, right?!

Tips For Building A Freezer Stash
building-a-breastmilk-freezer-stash-on-maternity-leave-3

Pump in the morning after putting baby down for 1st nap –

Milk supply is at it’s highest in the morning hours, so this is the time I noticed I would get the most bang for my buck. I usually kept the bottle of pumped milk out until I was certain she would stay down for her nap for a while. If she woke up hungry, I didn’t want to be “out” of milk. No one wants to be tapped out with a cranky, hungry baby! As a side, but very important note, do NOT pump during a growth spurt as your baby will need all the milk you can supply (unless you have an over-supply of breastmilk).

Pump in the evening after putting baby to bed –

Each night I would strap on my handsfree pumping bra, settle down into our comfy couch, and watch a show with my hubby whilst pumping for 20 minutes, or until both sides had emptied. Often I would feel discouraged because I would get so little in the evenings (1-2 ounces), but trust me it adds up! You can always leave that milk in the refrigerator to combine with the next session’s liquid gold before freezing.

Label your storage bags before pouring in the pumped milk –

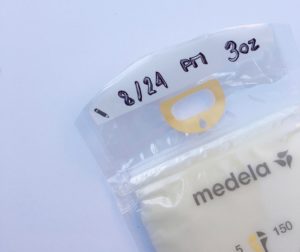
I label my bags with a Sharpie, noting the date, time and ounces. Some people note the exact time, but I just delineate between AM and PM. This is important so that you know which milk to use first.
img_7026-1

Store the milk in 2 and 3 ounce increments –

Storing milk in 2-3 ounce increments limits the potential for waste. If you fill each bag up to capacity and then thaw it out when needed, but your baby doesn’t eat all of it you can’t re-freeze or refrigerate it and it goes to waste. I froze a few 4-5 ounce bags, but mainly in smaller amounts. Here is a useful link I reference for how much milk to feed at what age.

After filling the storage bag, lay it flat to freeze –

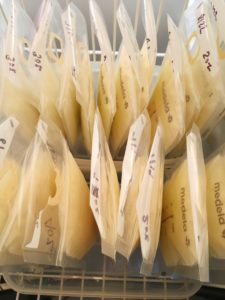
After you make sure the bag is TOTALLY sealed (I put that in all caps because I’ve lost milk to a false closure – R.I.P.) lay it flat to freeze. Once frozen it is much easier to line up your little milky soldiers:
img_6973

Store the milk storage bags in reverse chronological order –

You want to be using the oldest milk first. Breast milk can keep in the freezer for up to 6 months, so you’ll walk to keep track. Here is a link from KellyMom.com that gives great guidelines for storing and handling breastmilk, including how long it can keep in the freezer.

That’s how I built up a freezer stash while on Maternity Leave!

I’m definitely not a lactation consultant or expert by any means, but I thought I would share my experience with you in case you find yourself in the same situation (returning back to work) and with the same goal (maintaining your breastfeeding relationship) and want to start your own stash. I know that having one definitely decreased my anxiety about returning to work, and has continued to feel like a safety net for us over the last few months.

If you’ve been through this already, I would love to find out what worked and didn’t work for you in building up your own freezer stash. Or, if you have any questions – I’m here for you!

Thank you for reading.

xo, Ashley (1)

Other Ta[y]lor-made Mama posts you may be interested in:


How I Deal With Worry, Anxiety and Fear As A New Mom

how-i-deal-with-worry-anxiety-and-fear-as-a-new-mom

I post a lot on the blog about schedules, routines and strategies for organization for us moms and our babies. I do so not because I have everything totally together (definitely NOT the case), or that I feel like I have anything particularly groundbreaking to share, but honestly in large part because it helps me to feel in control, when a lot of the time I feel the exact opposite as a new mom. I hope I’m not the only mom who feels like they have no clue what they are doing and worries about every little thing a lot of the time – maybe you can relate? Oftentimes, this blog and my desire to help other moms, motivates me to be extra organized and prepared for new phases and adventures with Taylor so that I can share with you in a cohesive manner; At the same time, the process of thinking through, developing plans and writing about them for you decreases some of the fears, worries and anxieties that have come along with new motherhood for me:

  • What the heck am I doing? (I can’t tell you the amount of time I’ve thought this in the last 6 months!)
  • Will my milk supply drop when I start working full time? Will I be able to maintain the breastfeeding relationship like I want to?
  • Will Taylor be less bonded to me because I’m away from her at work?
  • How will I manage to successfully pump enough milk when I work full time?
  • Will I be able to handle working full time, and maintain my sanity?
  • Am I perceived at work differently, now that motherhood is my top priority?
  • Am I doing sleep training correctly?
  • Should I be sleep training at all? Do I want to? Need to?
  • When will I get to sleep more than 3-4 hours at a time again? Is this just a sleep regression?
  • When and how do I start Taylor on solids and finger foods? How much? What if she starts to choke on something?
  • Will I ever feel the elusive “balance” in life again?
  • Are my days of being in shape over forever? I know I’m not getting to the gym as often as I would like to…
  • Am I still a good wife, daughter and friend now that I’m more busy than I’ve ever been.
  • Am I a good mom?

The list goes on and on, and most days I just have to take deep breaths, trust that I’m doing the best I can and give it all to God.

One of my best friends called me out recently for putting out this post on what I pack in my daycare backpack too soon. I had just started back to work and put Taylor in daycare the week I posted and, within a month, we made the decision to pull her out. She is now at home on the days that I work with my mom and husband who works from home. The thought of her at daycare – not getting the one on one attention I was able to give during maternity leave, and totally out of my supervision – was literally giving me so much anxiety that I couldn’t function at work at even near full capacity on those days. When I posted, I didn’t know that I would feel the way I did, or that things would ultimately work out as they have for Taylor and I – that’s Motherhood.

While I do want to share that update with you, as it is part of my journey as a new mom and our journey as a family, I do not have any regrets about posting when I did. I prepared our daycare backpack way ahead of time and wrote that post so that I would feel more ready to send my baby girl to daycare – something I felt anxious about for months prior. It made me feel more confident to have everything together as much as I could on the outside, when on the inside I was anything but. I didn’t want to drop her off at daycare on those mornings for the month that I did, but having everything she would need packed and ready made me feel just a little better about it. Everyone deals with their anxieties, worries and fears differently. Maybe it’s because my dad is a Boy Scout Master or maybe it’s a slight case of OCD, but my way to deal is to be super prepared and organized. Did daycare ultimately work out for our family? No, it didn’t and we are SO blessed to have another option for Taylor’s care (thank you, Mom!).  My hope, as it was at the time I posted, is that the information will continue to help other new moms who don’t have the option to have their little one at home with a relative feel more prepared for the huge transition from being on maternity leave to returning to work and having to send their baby to daycare. That Daycare Backpack and it’s contents served us well for a short time, and I hope that post and what I put together for Taylor for that month continues to help other new moms – my whole goal for this blog.

I guess the purpose of this update is to keep it real with you, and make it clear that I am WELL aware that Taylor-made Mama is not the only blog for new moms out there – and for that reason I’m super thankful that you choose to follow along with our journey.

Thank you for reading my new mom tips, learned through trial and error as well as my “best guesses” that help me feel more prepared for motherhood, and like I know what I’m doing – just the slightest bit.

How do you deal with the inevitable worries, anxieties and fears that come along with becoming a mom for the first time?

xo, Ashley (1)

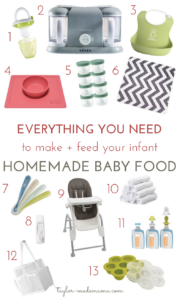
Must Haves For Making & Feeding Your Infant Homemade Baby Food

must-haves-to-make-and-feed-your-infant-homemade-babyfood-8

This post contains affiliate links for your convenience. All featured products I have purchased and use.

Hey mamas –

Are you getting ready to introduce solids to your babe? Do you want to save money, and have control over exactly what is going into their little body by making some or all of their food at home? Well, I would like to share the products I’ve been using to make life easier, cleaner and more organized when it comes to making and feeding Taylor homemade baby food. Initially I thought that, as a busy working mom, I wouldn’t be able to do the whole homemade baby food thing. Fortunately, once I started looking into the tools and products available these days, I found that it’s definitely possible and doesn’t take hours a week for me to do. Plus, making baby food at home saves a lot of money –  according to Mint.com, homemade organic baby food is nearly 45% cheaper than store-bought organic; homemade non-organic is almost 43% cheaper than store-bought non-organic.

Taylor’s Pediatrician gave us the green light to start solids at her 4 month appointment, but I honestly wasn’t ready. It felt weird to give her food when my body had been all that has sustained her for so long. I waited for another month until she starting showing a lot of interest in our food – even imitating us chewing as we ate. I introduced one new food to her every 3 days or so to make sure she didn’t have an allergy. Now, at 6 months old, she has tried about 10 varieties of food, and combinations of those foods (her favorite so far is quinoa + yam + zucchini).

If you are ready to start feeding solids and/or are also looking to make and feed your little one homemade baby food, I’m hoping this list will be helpful to you.

1. Munchkin baby food feeder – this was an item shipped to me in my first Baby Bin – a personal online shopping service for your babe, which you can read more about here. You can put jarred or homemade pur©es, or whole veggies/fruit into the feeder and allow your baby to self feed.

img_6420.jpg
Yummy banana!

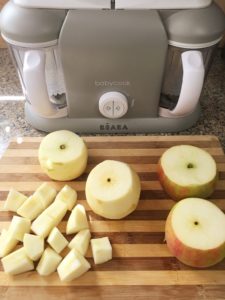
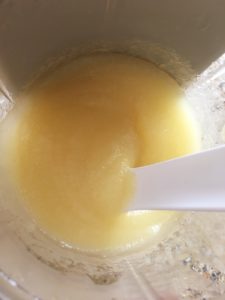
2.B©aba Babycook Pro 2X – This is the linchpin to homemade baby food making work with my busy schedule. Yes, it’s a little more pricey than a NinjaMagic Bullet (also great options) or a blender you already have at home, but it is WELL worth it when you consider the time and money you can save with it. The Babycook steams, blends and reheats all in one! I can put in chopped up fruit or veggies (or one of each since there are two sides in the pro version!), push the steam button and walk away to take care of fixing dinner for my hubby and I, doing laundry, playing with Taylor, cleaning, etc. Just 15-20 minutes later when I hear the timer go off, I can then dump the steamed contents into the same canister, switch to blend mode and pure to the perfect consistency. I can use the residual steam water or breastmilk to get the desired thickness. Days worth of homemade baby food in less than a half hour, and I don’t need to worry about cleaning up more than two canisters? Score! You can watch a video here for more on how the Baba works it’s magic.

img_6131.jpg
Applesauce in the making.
img_6133
Perfect consistency!

3. Baby Bjorn bibs – I saw my best friend’s daughter wearing this bib one day and totally stole the idea – my bff seriously has the best ideas! Prior to this, I was going through cloth bibs like nobody’s business and it was making me a little crazy. These bibs are great because they actually catch the food that inevitably dribbles down and can be easily wiped off after a feeding. There are lots of fun colors to choose from too.

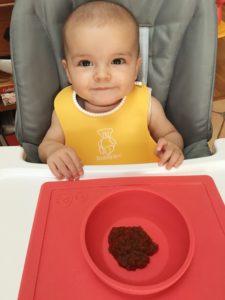
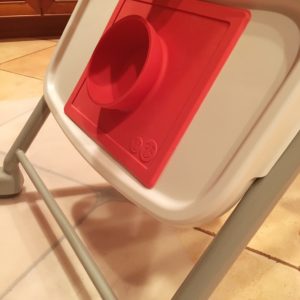
4. EZPZ bowls – These bowls are dishwasher and microwave safe (although I don’t microwave any of her food) but the best part is that they stick to trays and tables, making it impossible for your babe to push, pull or dump the contents as they could with a regular bowl. There are also versions with more than one compartment to hold finger foods.

img_6345
Excited to try a new pure.
img_6670
EZPZ storage!

5. Sage Spoonfuls storage containers – these are great for storing food that I plan to feed Taylor within the week. I also use these to reheat frozen baby food in the Baba Babycook.

img_6343-1

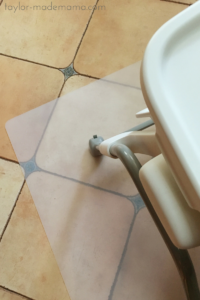
6. Spill mat for underneath the high chair – I bought a mat that would go underneath a desk chair because I liked the idea of clear and simple, but there are some really cute patterned mats made for this exact purpose like this one.

spill-mat-high-chair-t

7. Spoons – these silicone spoons by Baba are my favorite. They are BPA, lead and Phthalate free and designed specifically for infants who are just being introduced to solid foods. I’m not sure what spoons to go to next, but for now these are perfect.

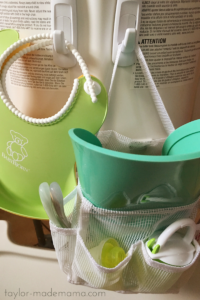
8. 2 Command Hooks – I bought and placed two command hooks on the back of the highchair so that I could store and have easy access to her bibs and all the little parts and gadgets that go along with feeding. See #12 for the shower caddy I use to store everything.

command-hooks-for-high-chair
Command hooks for the win!

9. High chair – I am obsessed with this OXO high chair. Highlights are:

  • you can wheel it around the house as needed (i.e. getting ready in the morning)
  • it reclines if your babe falls asleep
  • the seat fabric is super easy to wipe/clean
  • It’s also very reasonably priced, at less than $120. If money is no object and/or you care about the aesthetics of your baby furniture and products, I would recommend Stokke high chairs. I have a couple friends who have these chairs and they look wonderful in any dining room and also transition into a chair as the baby grows into a toddler and beyond.


10. Washcloths/Water Wipes – I keep several of these and a pack of water wipes (99.9% water and monk fruit extract) in the shower caddy for after meal clean ups.

11. Kiinde squeeze pouches and spoon attachment – I haven’t used these yet, but bought a whole box of 50 for when we are out and about and having a squeeze pouch would be a lot more convenient than a bowl and spoon.I also purchased a funnel attachment so that I can pour pures directly from the blender into the pouches. Taylor also enjoys trying (key word trying) to feed herself, so the flexy spoon attachment will be just perfect!

12. Shower caddy – This is a super cheap shower caddy that is the perfect size to store spoons, washcloths, bowls, etc. and hook onto the back of the high chair.

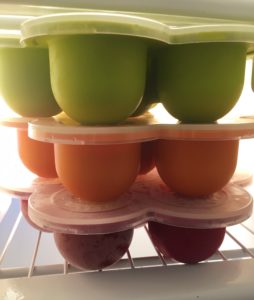
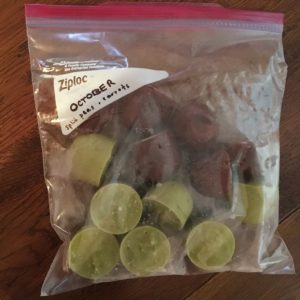
13. Ice cube trays – I like to use these by Baba because they are super easy to get frozen food out of and into a Ziploc for storage. They’re also dishwasher, freezer and microwave safe.

img_6348

img_6672

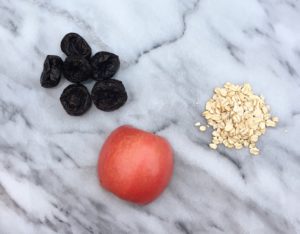
So far, I’m finding that making baby food is a lot of fun. It is also a great way to introduce lots of new foods to Taylor that our family is eating anyway. For example, I made AJ and I some zucchini with our chicken the other night, and threw a few of the cooked pieces into our Baba Babycook and served up a pure for Taylor to try. I personally taste all of the pures to make sure they are actually tasty, and it’s pretty gratifying to see her smile or make a little “mmmm” noise when she likes something I’ve make. Am I going to make every single one of her meals homemade? That would be awesome but probably not, especially when we travel, but luckily there are some great organic baby foods to purchase in a pinch! We tried a new recipe today (to help with the constipation that can come along with beginning solids, poor baby…) that T loved: oats + prunes + pink lady apple. 

img_6671

What are your babe’s favorite foods? Any combos I need to introduce to her?  I’d love to hear from you!

xo, Ashley (1)

Other Taylor-made Mama posts you may be interested in:

Personal Online Shopping For Your Baby


Hey mamas!

I can hardly wait to tell you about this awesome service I was recently introduced to, Baby Bin. It’s convenient, useful and simply fun. This is the perfect service for busy mamas who value usefulness, relevance and quality yet don’t have the time to run around to a million stores – we’d rather be spending that time snuggling our babies, am I right? As a busy new, working mom, I’m all about online shopping and time saving services (hello Instacart, Door Dash, Amazon Prime, etc.) and Baby Bin fits the bill.  Baby Bin is a personalized online shopping service wherein a personal shopper (a real life, experienced mama) selects age/developmentally appropriate products for your baby that are shipped directly to your doorstep. It’s like Stitch Fix for mamas + babies. I’m absolutely LOVING this concept right now.

screen-shot-2016-10-13-at-9-15-19-pm

How It Works:

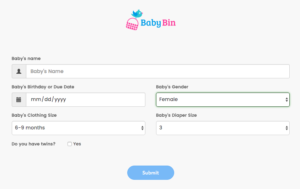
To get started, you enter some information about your baby so that your personal shopper can select items that would be particularly useful for his or her age and stage. You will be sent an electronic preview of the items selected, and get to decide what you want sent directly to your home and what you could do without. You only pay for the items you choose to keep! If you end up deciding that you don’t want to keep anything that is sent to you, Baby Bin has a FREE shipping and return policy for 30 days.

img_6368.jpg

Babybin - Essential baby products

What I Kept:

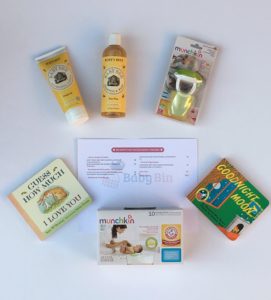
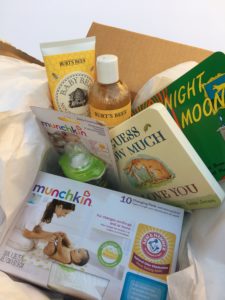
Of the many recommended items in my online preview, I chose to have the following six shipped to us:

  1. Burt’s Bees Baby Bee Shampoo & Wash – $8
  2. Burt’s Bees Baby Bee Diaper Ointment – $9
  3. Guess How Much I Love You Board book – $5
  4. Goodnight Moon Board book – $6
  5. Munchkin Arm and Hammer Disposable Changing Pads– $7
  6. Munchkin Baby Food Feeder – $6

img_6367.jpg

My favorite item and one wish for next time:

My favorite item so far has been the Munchkin baby food feeder – I had never seen this product before, and the timing was spot on as I began introducing solids to Taylor two weeks ago. I put a piece of banana into the feeder the other morning and she seemed to really enjoy gumming it. The only thing I thing negative I can say about my experience with Baby Bin was that I wish that there had been some toy/activity options presented – hopefully next time!

img_6420.jpg

I look forward to our Baby Bin personal shopper introducing us to other useful brands and products, as well as sending practical items I would need to buy anyway – all without having to give up any of my precious time with sweet T. I can’t wait for next month’s Baby Bin!

Want to give Baby Bin a try this month? Click this link to get started!

If you order a bin, I’d love to hear your thoughts!

xo, Ashley (1)

This post contains affiliate links. All views and opinions are, as alway, 100% mine.

personal-shopping-for-your-baby

Baby Car Kit Essentials

baby-car-kit-essentials

You thought you would only be gone from the house for 20 minutes and baby’s just been fed and changed – no need to bring the diaper bag along…Of course, this ends up being the one time you discover a flat tire when you come back out from the store, the baby has an unexpected and rather intense blowout, a traffic accident has you basically parked on the freeway 5 minutes from home, out to eat and a stomach bug hits (enough said)….insert other unexpected and/or messy situation…. Well, it’s a good thing you’ve got your emergency car kit stocked and ready to go!

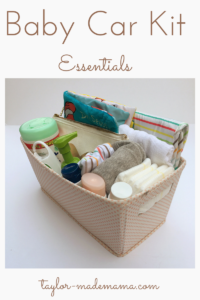
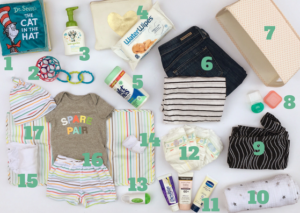
Maybe it’s because I’m the daughter of a Boy Scout Master, but in my book, it’s always a good idea to be over prepared. This post will outline all the essential back up supplies you and your infant would need in case of a mess, change in the weather, delay, mom brain forgetting to re-stock the diaper bag, etc. I hope this visual and list can give you some ideas to create or add to an existing baby car kit.

baby-car-kit-essentials-1

Baby Car Kit Essentials

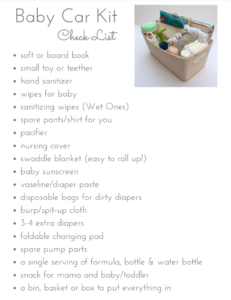
To access the printable Baby Car Kit Checklist use this link or just click on the image below.  Print it, shop with it, then keep it in your kit to make sure you’re always stocked up. As a subscriber, you can access and download this and any of the other printables (including Toddler Car Kit and Toddler Diaper Bag Checklists you can use a little later on!!)  from my website by going to the Printables Library Page and entering the password I emailed to you when you subscribed.

baby car kit emergency car kit

1.Soft book – if you get stuck somewhere unexpectedly having a book on hand would be a great distraction and keep boredom at bay. Taylor loves soft books like this classic Cat In The Hat and they can be easily stuffed into your car kit. The Very Hungry Caterpillar is also a great choice.

2. A Toy – for the same reasons as above, a toy or two will come in handy. Taylor is entertained by these rings for shockingly long lengths of time, and an Oball is another standby favorite. For more on developmentally appropriate toys for 0-4-month-olds read this post.

3. Hand Sanitizer – I have one of these Babyganics hand sanitizer pumps in our change table caddy, nursing station basket and in the emergency car kit. I like this brand because it is alcohol and paraben free, yet 99% effective in killing germs. And, trust me, you’ll wand a healthy pumping of sanitizer after a major, on the road blow out.

4. Baby WipesWater Wipes are my go to – they are natural, gentle and only have two ingredients (99.9% pure water and 0.1% fruit extract) therefore you can use them for wiping baby’s bum, hands and even face.

5. Sanitizing Wipes – You may very well need these to wipe down a car seat, trunk bed, etc. I’ll leave it at that ; ) Our new favorite wipes brand is Babyganics; I have been buying these individually wrapped packets and stuffing them in my car, pockets diaper bag, portable high chair pocket, purse, basically everywhere:

6. Spare Outfit for Mama – I have this striped top in several colors. It’s long sleeved, yet light enough to use as a spare in any season. Add a pair of jeans that can be worn with casual or dressier shoes, and you’re good to go in case of a blowout or spit up emergency.

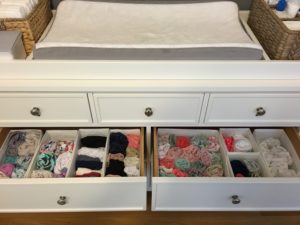
7. Storage Bin – I bought a cute bin for $5 on sale at Target, but these Ikea boxes are cheap and would work perfectly. I have 4 or 5 sets of these. The rest of the set can be used for nursery drawer organization as shown here:

img_1918

8. Extra Pacifier – I like storing extra pacis in small Tupperware containers like these or these. Taylor will only take the Soothies brand.

9. Nursing Cover – You may or may not be nursing and/or concerned with being exposed when breastfeeding, but I like having a spare nursing cover in the car just in case. Here are

my favorite styles:

10. Swaddle Blanket – my favorites are these Aden & Anais muslin blankets – I use them to cover Taylor’s car seat to shield her from the sun, and also to keep her warm when it’s a little cold or windy out.

11. Baby Sunscreen & Diaper Creams – these are totally up to your preference, but I personally feel most comfortable using this Neutrogena Pure & Free baby sunscreen on Taylor.

12. 3-4 extra Diapers

13. Diaper Disposal Bags – I have these Munchkin bags and dispensers in my diaper bag, daycare bag and car kit (click on the links to find out exactly what I pack in those bags!).

14. Pair of Socks

15. Burp Cloths – I have 4 packs of 10 of these cloth diapers that I use as burp cloths. The will come in handy when wipes just won’t cut it.

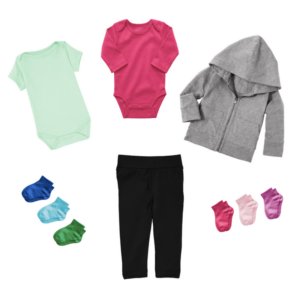
16. Spare Pair Outfit for Baby – Seriously, just grab a onesie, a pair of pants and a beanie or hat that you already have – you don’t need anything fancy. Make sure to keep the size of your spare outfits/diapers updated for baby! I highly recommend creating a “spare pair” set from Primary.com. They have the best baby basics in SO many different colors, for really reasonable prices (all under $25!) – plus, you get 20% off your first order (click the banner below to shop)! To learn more about Primary and some of my other mama must-haves check out my Resources page.

Here would be my recommendation for a spare pair outfit:

baby-basics
Primary_Kids_Clothing_20_Percent_Off
img_6092.jpg

17. Changing Pad Clutch – there are so many versions of this available. I have this one and really like it, but there are several other great options like this one or this one.

Other Miscellaneous items to keep in the car:

A Restaurant Kitcreate a Restaurant Kit with all the essentials you need to reduce the stress of dining out with babies and keep it in the car alongside your Baby Car Kit. You’ll find a full list of contents for babies and suggested additions for older babies and toddlers, as well as 10 tips to make dining out with a baby less stressful in this post.

Click on the picture to find out more on this bag!

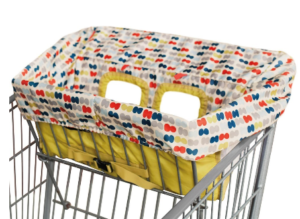
A Grocery Cart and High Chair Cover –  it’s just more sanitary than plopping her down without wiping down the surface with sanitary wipes I may or may not have with me…


Feeding-related items

*A spare bottle, single serving of formula and a sealed water bottle to use for mixing. I did not include this in my photos as I am still exclusively breastfeeding, but if and when I switch to formula this will be a must-have in my car kit. If you have a toddler or older kiddo, definitely include an emergency snack in case you get stuck somewhere! For babies just starting to eat solids, these Happy Baby meltable yogurt snacks are perfect to keep in the car in case of “hanger” in an unexpected situation:

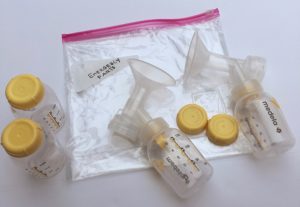
* I keep a bag of spare pump parts in my car at all times in case I forget to restock something in my pumping bag the night before work. Read THIS post to find out exactly what I pack in my pumping bag for work. If you’re a nursing/pumping mama I also recommend having a manual pump in your car in case you get stuck somewhere away from baby unexpectedly and need relief.

img_6103-2

So there you have it – everything you need for a well-stocked baby car kit. If you want to know what’s in my diaper bag and how I keep all the little baby things organized, check out THIS POST!

img_6102
All the essentials for a baby car kit.

xo, Ashley (1)

If you liked this post, check out other posts in this series:


The BEST Lactation Cookie Recipe (gluten free!)

This post contains affiliate links for your convenience. The products linked are ones I use and enjoy!

Do you want to increase your milk supply? Are you worried about a dip in your milk production when you return to work after maternity leave, or when your monthly friend finally returns? I know I was!

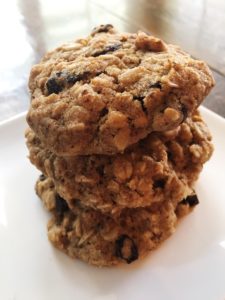
About a month and a half before I returned to work, I started trying to build up a freezer stash of breastmilk in anticipation of an inevitable dip in my supply. My goal is to breastfeed Taylor up to her 1st birthday, but I knew that wouldn’t be easy with going back to work and I needed a game plan. I would pump once in the evening after I put Taylor to bed, and another time in the early morning, after her 3-4AM feed (find out exactly what I stock in my pumping bag in this post). I noticed I really wasn’t producing much extra, so I started researching ingredients that would give me a needed lactation boost. I came across a recipe that I modified to be almost gluten free (oat flour- yum!) and low sugar, since the concept of intentionally eating cookies all day long was appealing but also not part of my postpartum fitness plan. Exclusively nursing mom’s do need to consume between 300-500 additional calories a day to keep up their milk supply, so make those extra calories work for you and your baby by munching on these cookies.

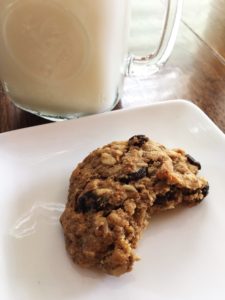
img_5529.jpg
Even my hubby agrees that they’re DELISH!

Now that I’m back at work, I make a batch of my trusty cookies every few weeks to provide the added milk supply I need to keep up with pumping enough at work to meet Taylor’s needs.  Read more about my working mama pumping/feeding schedule in this post. I notice a 3-4 ounce difference between the days I eat the cookies, and the days I do not. So far, I’ve only had to dip into my freezer stash a couple of times, usually during the weeks when I haven’t taken the time to make a batch. [update as of 1/7/16: I am still breastfeeding and successfully pumping at work, and now take this Honest Co. Lactation Supplement, 2 pills once per day, in addition to eating these cookies when I’ve noticed a dip].

increasing breastmilk supply
This is 5 ounces more than I was able to pump pre-cookies.

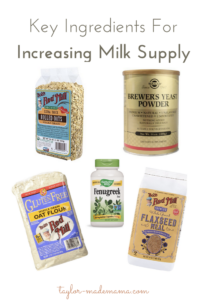
The key to the cookie’s effectiveness is in their super lactation boosting ingredients. Almost all of these ingredients can be purchased through Amazon Prime Pantry, which is an AMAZING resource for us busy mamas with limited time to get into the actual grocery store. You’ll only need to buy most of the ingredients once (i.e. Brewer’s yeast, Fenugreek tablets, oat flour, etc.) because you only use a bit per batch – well worth the initial investment!

Make sure to check out all of my posts related to breastfeeding and weaning HERE! I truly hope you find inspiration, strategies, and encouragement to keep you going on your breastfeeding journey.

Other Taylor-made Mama posts you may be interested in:

key-ingredients-for-increasing-milk-supply-1

The Best Lactation Cookie Recipe:

Ingredients 

1 cup butter softened

1 cup sugar (I substitute this Truvia baking sugar or coconut sugar)

1 cup brown sugar (I substitute this Splenda brown sugar blend)

4 tbsp of water

2 tbsp flaxseed meal

2 large, omega 3 eggs

1 tsp vanilla extract

2 cups oat flour

1 tsp baking soda

1 tsp salt

3 cups of thick cut oats

1 cup of raisins

4 tbsp of brewer’s yeast  (NOT ALL Brewer’s Yeast is GLUTEN FREE – the brand linked is!)

9 fenugreek capsules (empty capsules and throw away casings)

Directions

  1. Preheat the oven to 375 degrees.
  2. Mix flaxseed meal and water, set aside.
  3. Sift together dry ingredients (flour, brewer’s yeast, salt, soda and fenugreek), set aside.
  4. Blend butter and sugars well.
  5. Blend in eggs, one at a time.
  6. Stir in flaxseed mix and vanilla, mix well.
  7. Add dry mixture in three equal parts.
  8. Stir in oats and raisins.
  9. Drop on baking sheet 1 inch apart.
  10. Bake for 10 – 15 minutes.

img_5531-1.jpg

Ideally, you would space out your cookie consumption throughout the day; when I’m trying to up my milk supply I’ll eat one in the morning, another as a snack at work, and then another in the evening. I always throw a cookie (or two!) in a Ziploc into my pumping bag as a pump sesh snack.

If you find yourself needing a boost in your milk supply like I did, whip up a batch of these and give them 24-48 hours to help you out. Happy snacking/lactating!

xo, Ashley (1)

Mess Free Tummy Time Art Project For Infants

art-project-for-infants-1

This post contains affiliate links for your convenience. All views and pictures are 100% mine.

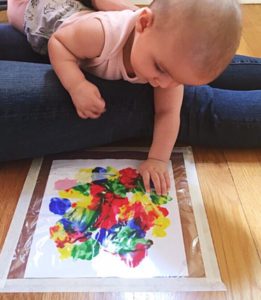
Are you looking for ways to encourage your little one to spend more time [happily] on their belly, or has your babe now figured out how to roll out of Tummy Time? Well, I found the perfect activity to capture their attention and keep them occupied in Tummy Time….finger painting!! Now ,before you start imagining primary colors all over your baby and your floors, let me tell you that the best part about this finger painting project is that it’s completely mess free. Yeay!

img_5699.jpg

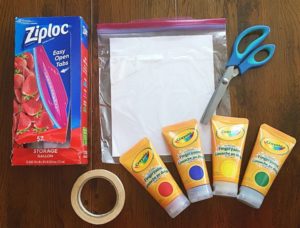
Supplies you’ll need:

Step by Step:

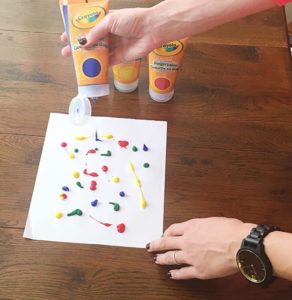
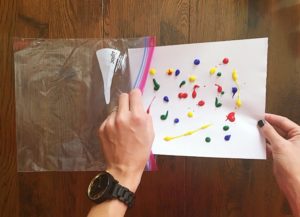
  1. Squirt finger paint at random onto a plain white piece of paper:

img_5700.jpg

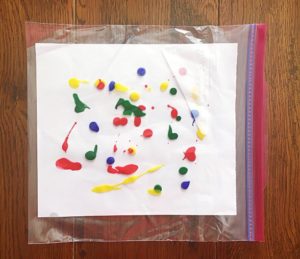
2. Slide the paper + paint into the Ziploc:

img_5701.jpg

3. Zip the Ziploc (duh):

img_5702.jpg

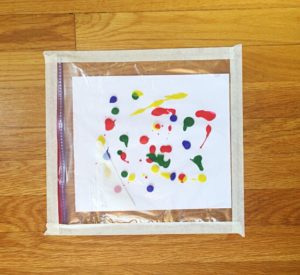
4. Tape the Ziploc to the floor:

img_5703.jpg
Wider masking tape would be an even better choice.


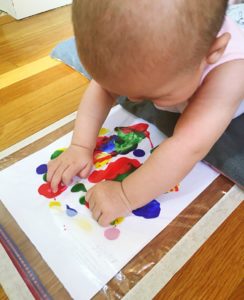
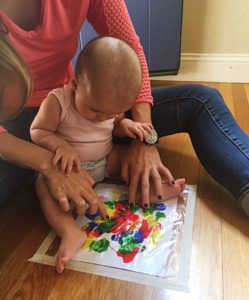
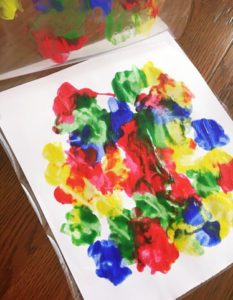
5. Help baby into Tummy Time and allow them to touch, smush and smear the paint however they like:img_5697.jpg

If your baby isn’t yet independently pushing up into tummy time, you can use a Boppy pillow, rolled up towel, or your lap to support their chest and allow their hands to be free for the project.

tummy time

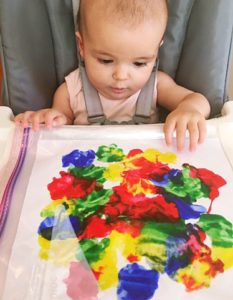
You could also work on the project with a supported sitter, or even using the highchair tray if Tummy Time isn’t working for your little one:

img_5708.jpg

img_5707.jpg


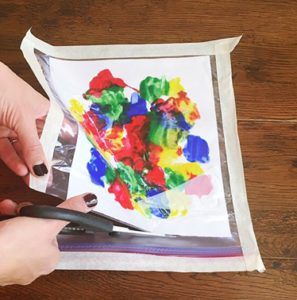
6. Cut around all the edges of the Ziploc:

img_5705.jpg

7. Peel up, take out their masterpiece, and lay it flat to dry:

img_5706.jpg

Voilá – your baby is a regular Picasso!

If you’re feeling adventurous [AKA up for a mess] below are some fun recipes for EDIBLE finger paint you can use for out of the Ziploc fun with your older infants/toddlers. I’m looking forward to those days!

Now that Taylor is a little more physically coordinated [AKA able to roll out of Tummy Time] I really want to start incorporating more sensory-based art experiences like this one for her. I’m hoping to do a couple activities a month with her on my off day and share them with you here. I think we can develop quite the little art gallery!

I hope you have fun with this one, mama.

xo, Ashley (1)

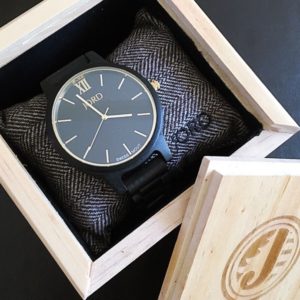
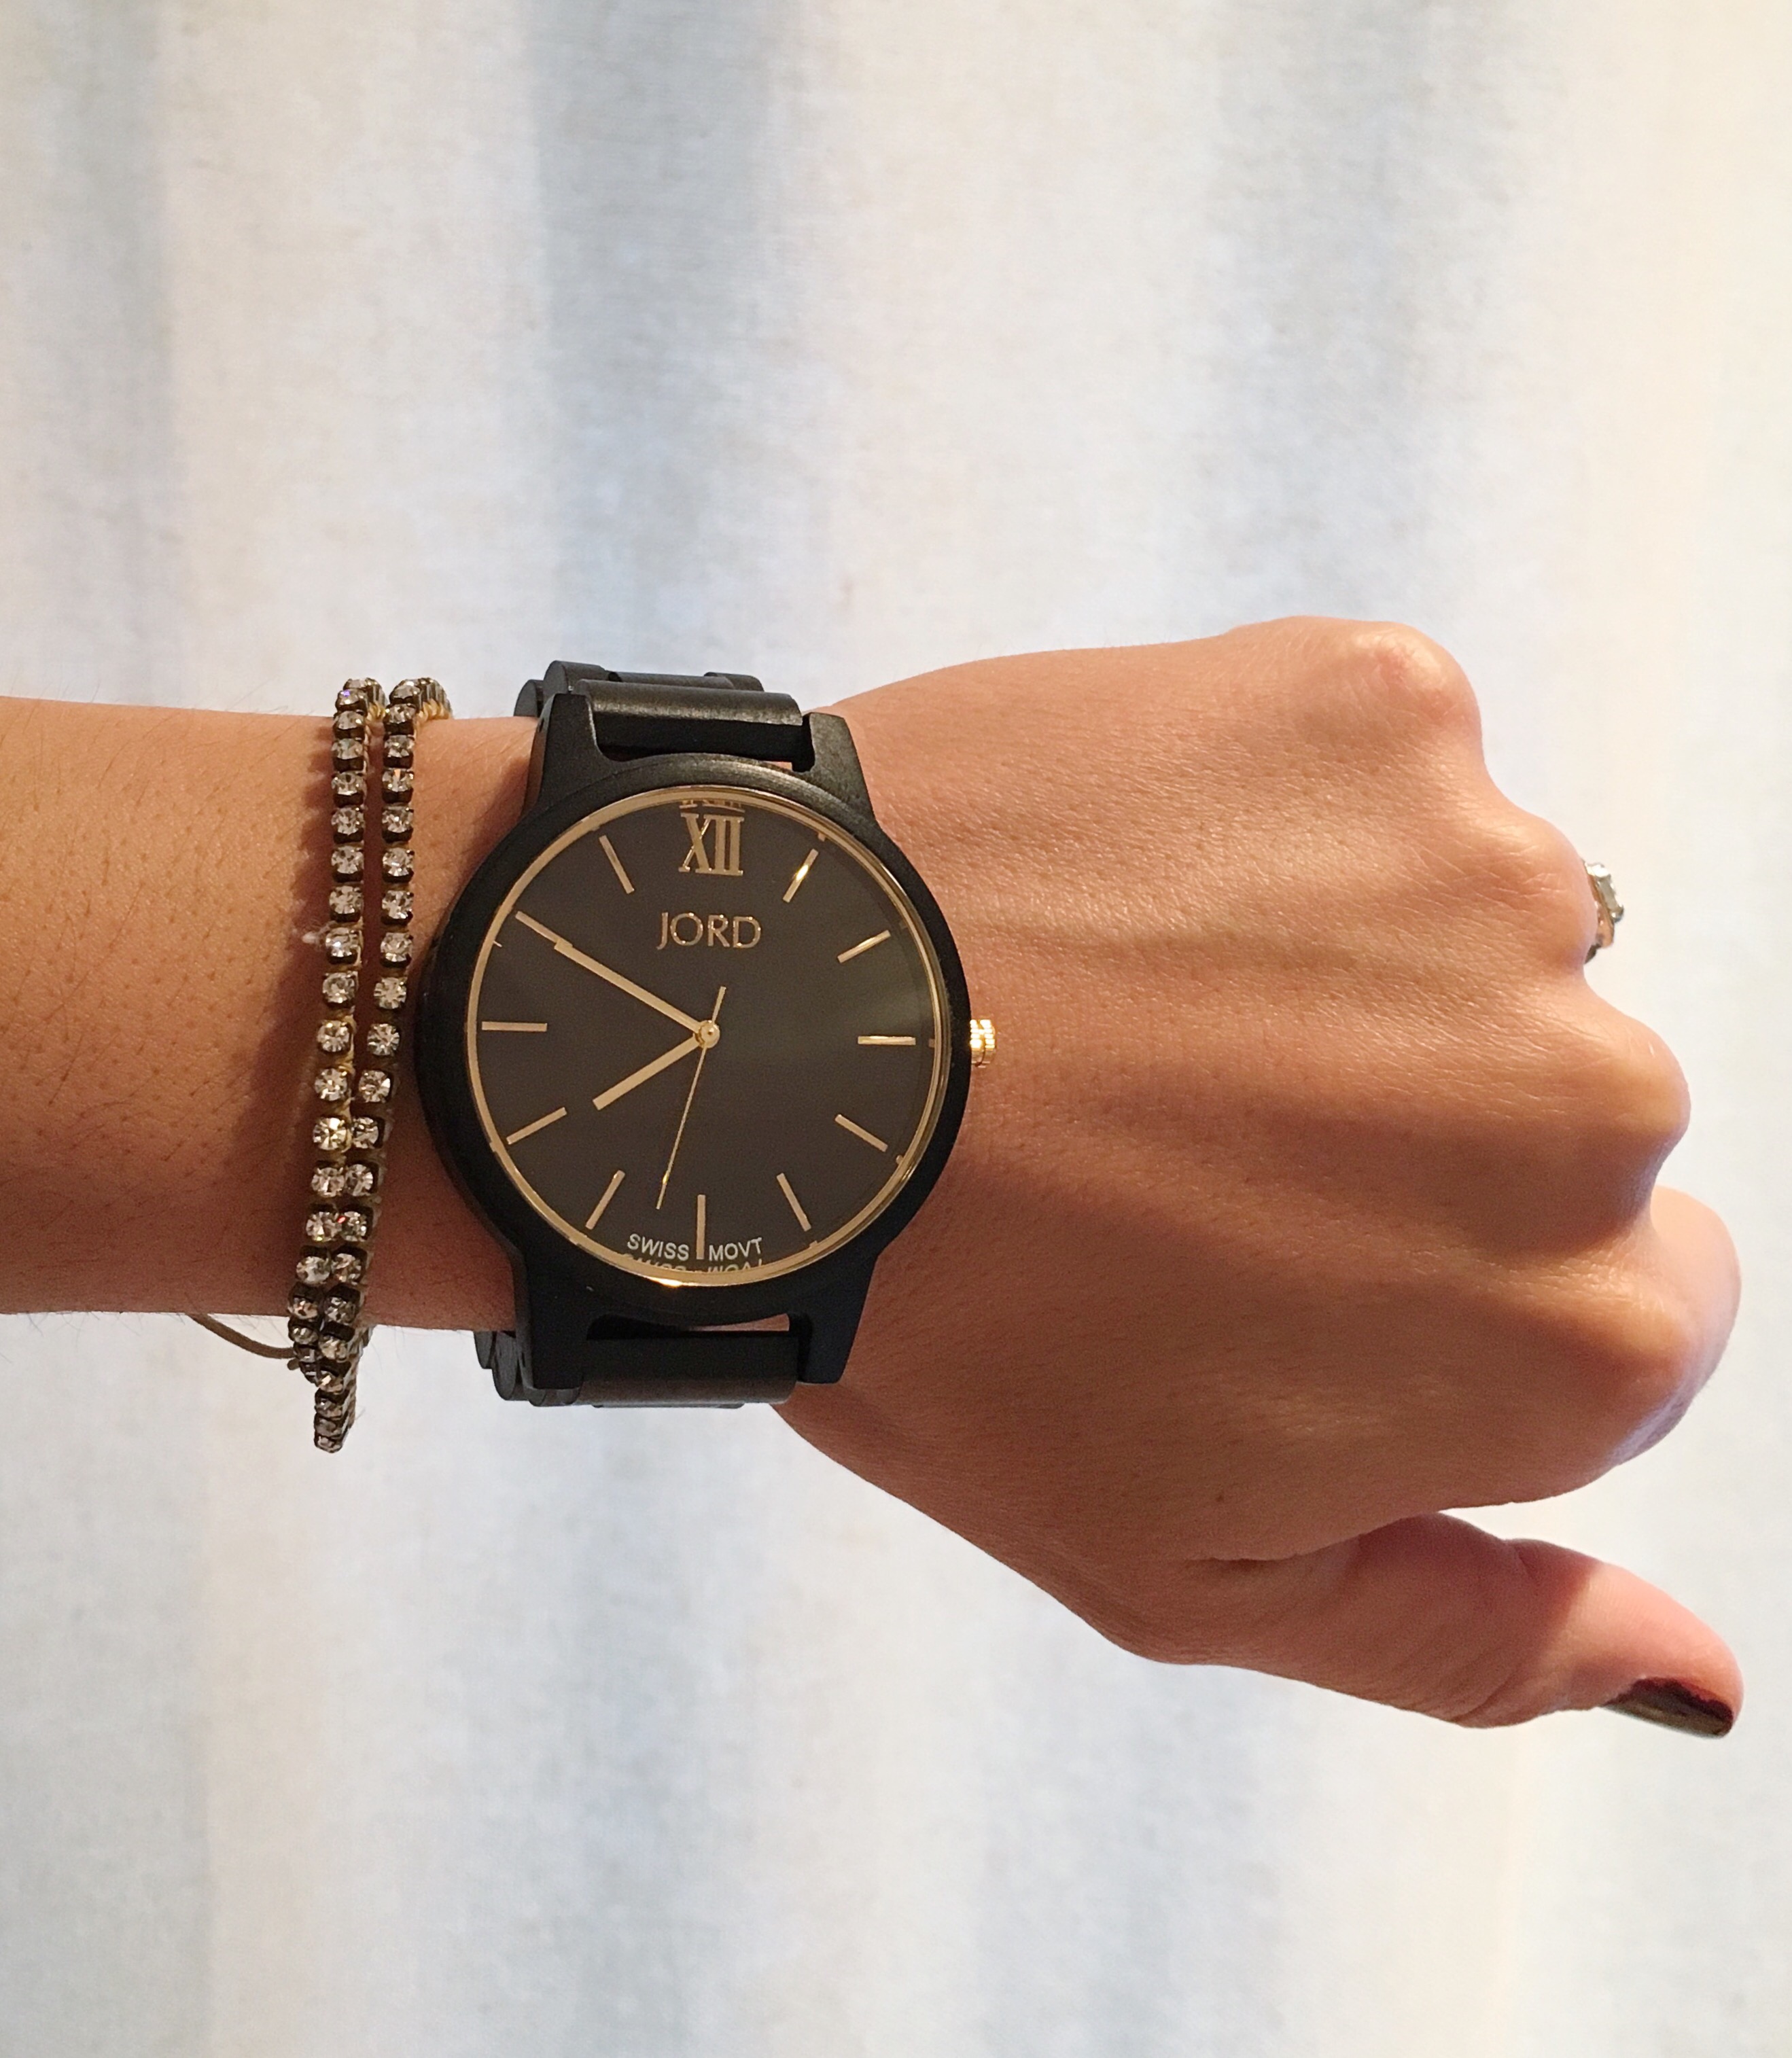
My watch: JORD Wood Watches, the Frankie Series

Working Mama’s Fall Style (Featuring: JORD Wood Watches)

jord-wood-watches-and-working-mom-style

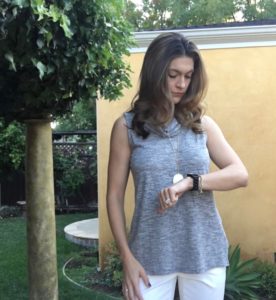
As fall approaches, I’ve been working on adding in some transitional pieces and accessories to my work wardrobe.  I need to dress professionally and conservatively, but many days it’s still hot enough around here that sleeveless is the only way to go. I found three tanks fit the the bill perfectly – this ruffled one, this cowl neck one and this flattering black one. I typically throw a blazer or cardigan over the sleeveless top in case of a cooler morning or blasting AC in the office.

img_5497-2
Yes, I’m fake checking the time but you get the idea…

No matter what I’m wearing at work or on the weekend, I always accessorize with a watch. It’s really important to me to be able to easily keep time at work or home. Plus, I think a watch adds an element of refinement & class to a woman’s ensemble. Being a working mom makes me constantly aware of time; I’m regularly checking my wrist to make sure I accurately time my pumping sessions, or to make sure I leave my office in time for my next meeting. At home and on the weekends, I still reference my watch quite often to make sure I’m sticking to Taylor’s feeding/napping schedule, or that we’re not heading home from a date night too late.

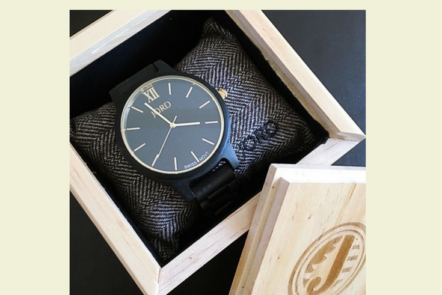
My new wear-with-everything watch for Fall and beyond is this gorgeous JORD Wood Watch:

img_5355

A few weeks ago JORD sent me this elegant and unique wood watch, and I instantly fell in love with it as well as this high quality brand. It is the perfect transitional timepiece that I can wear into any season, both at work and on the weekends. I can pretty much wear it with every outfit I come up with, and it looks great layered or as a stand alone statement piece [my go-to!]. I chose the Frankie in Ebony 7 Gold, but there are so many other awesome styles and colors of JORD women’s watches to choose from. They have SO many beautiful styles, you are bound to find your favorite! Their men’s watches are super cool too and would make a PERFECT fall birthday, Christmas or just because gift for a man in your life [hopefully AJ isn’t reading this…]

img_5559

If you love the look and quality of these watches as much as I do, then click THIS LINK to enter for a chance to win $75 toward your very own JORD Wood Watch. Only one person will be the $75 winner, but JORD will send you a $20 code to shop their site JUST for entering!

To enter all you have to do is click THIS LINK and enter your name, email and favorite watch.

How easy is that?!

Happy entering and GOOD LUCK, Mama!

xo, Ashley (1)
This post was sponsored by JORD Wood Watches.

5 Tips For Getting Your Newborn To Sleep

5-tips-for-getting-your-newborn-to-sleep

This page may contain affiliate links. Views are 100% mine.

The first three months of a baby’s life is sometimes referred to as the 4th Trimester. They are as much outside their comfort zone as you are out of yours as a new mama. For 9 months they were soothed to sleep by your movement throughout the day, constant whirring of noise in the womb, and the snuggly feeling of compression all around. It must be pretty darn cozy in there (heck Taylor decided to stay an extra 8 days!). It’s no wonder babies have a difficult time settling and falling asleep in the outside world. I think the saying “sleeping like a baby” is actually sort of backwards when it comes to newborns; if someone is sleeping like most newborns, then they’re probably having a difficult time falling and staying asleep! For the 4th trimester, I didn’t worry about sleep training or if I was creating any bad sleep habits – it’s the time to just do whatever you can to help your sweet newborn (and yourself!) get some rest. Give yourself that freedom and do whatever works for you and your baby. Read more about surviving the first weeks with your newborn in THIS post.

When Taylor was born I was naively surprised that I couldn’t just put her down with a pacifier and have her fall asleep. I guess I had never spent enough time around a newborn to know that, with rare exception, it’s just not that easy. In fact, Taylor rejected a pacifier until she was 4 months old. Trust me, I tried every trick and variety of pacifier I could find, all to no avail – little mama just wasn’t having it. It was hard to watch her struggle so much to fall asleep and feel like I had no clue how to help her. However, having a baby who wouldn’t take a pacifier encouraged me to really look into what else (aside from sucking) helps newborns feel soothed enough to fall asleep.

I am by NO means an expert, and obviously every baby is different, but I  do want to share 5 things that really worked well for Taylor. These are 5 things I wasn’t doing for the first month of her life, and that I noticed made a huge difference once I started. Within one week of implementing these 5 things Taylor was sleeping 8-9 hours for her first stretch of sleep followed by 3-4 more, at only 6 weeks old!

If you’re a brand new mama, I hope some of the things that worked for us work for you and your newborn as well.

1. Swaddle

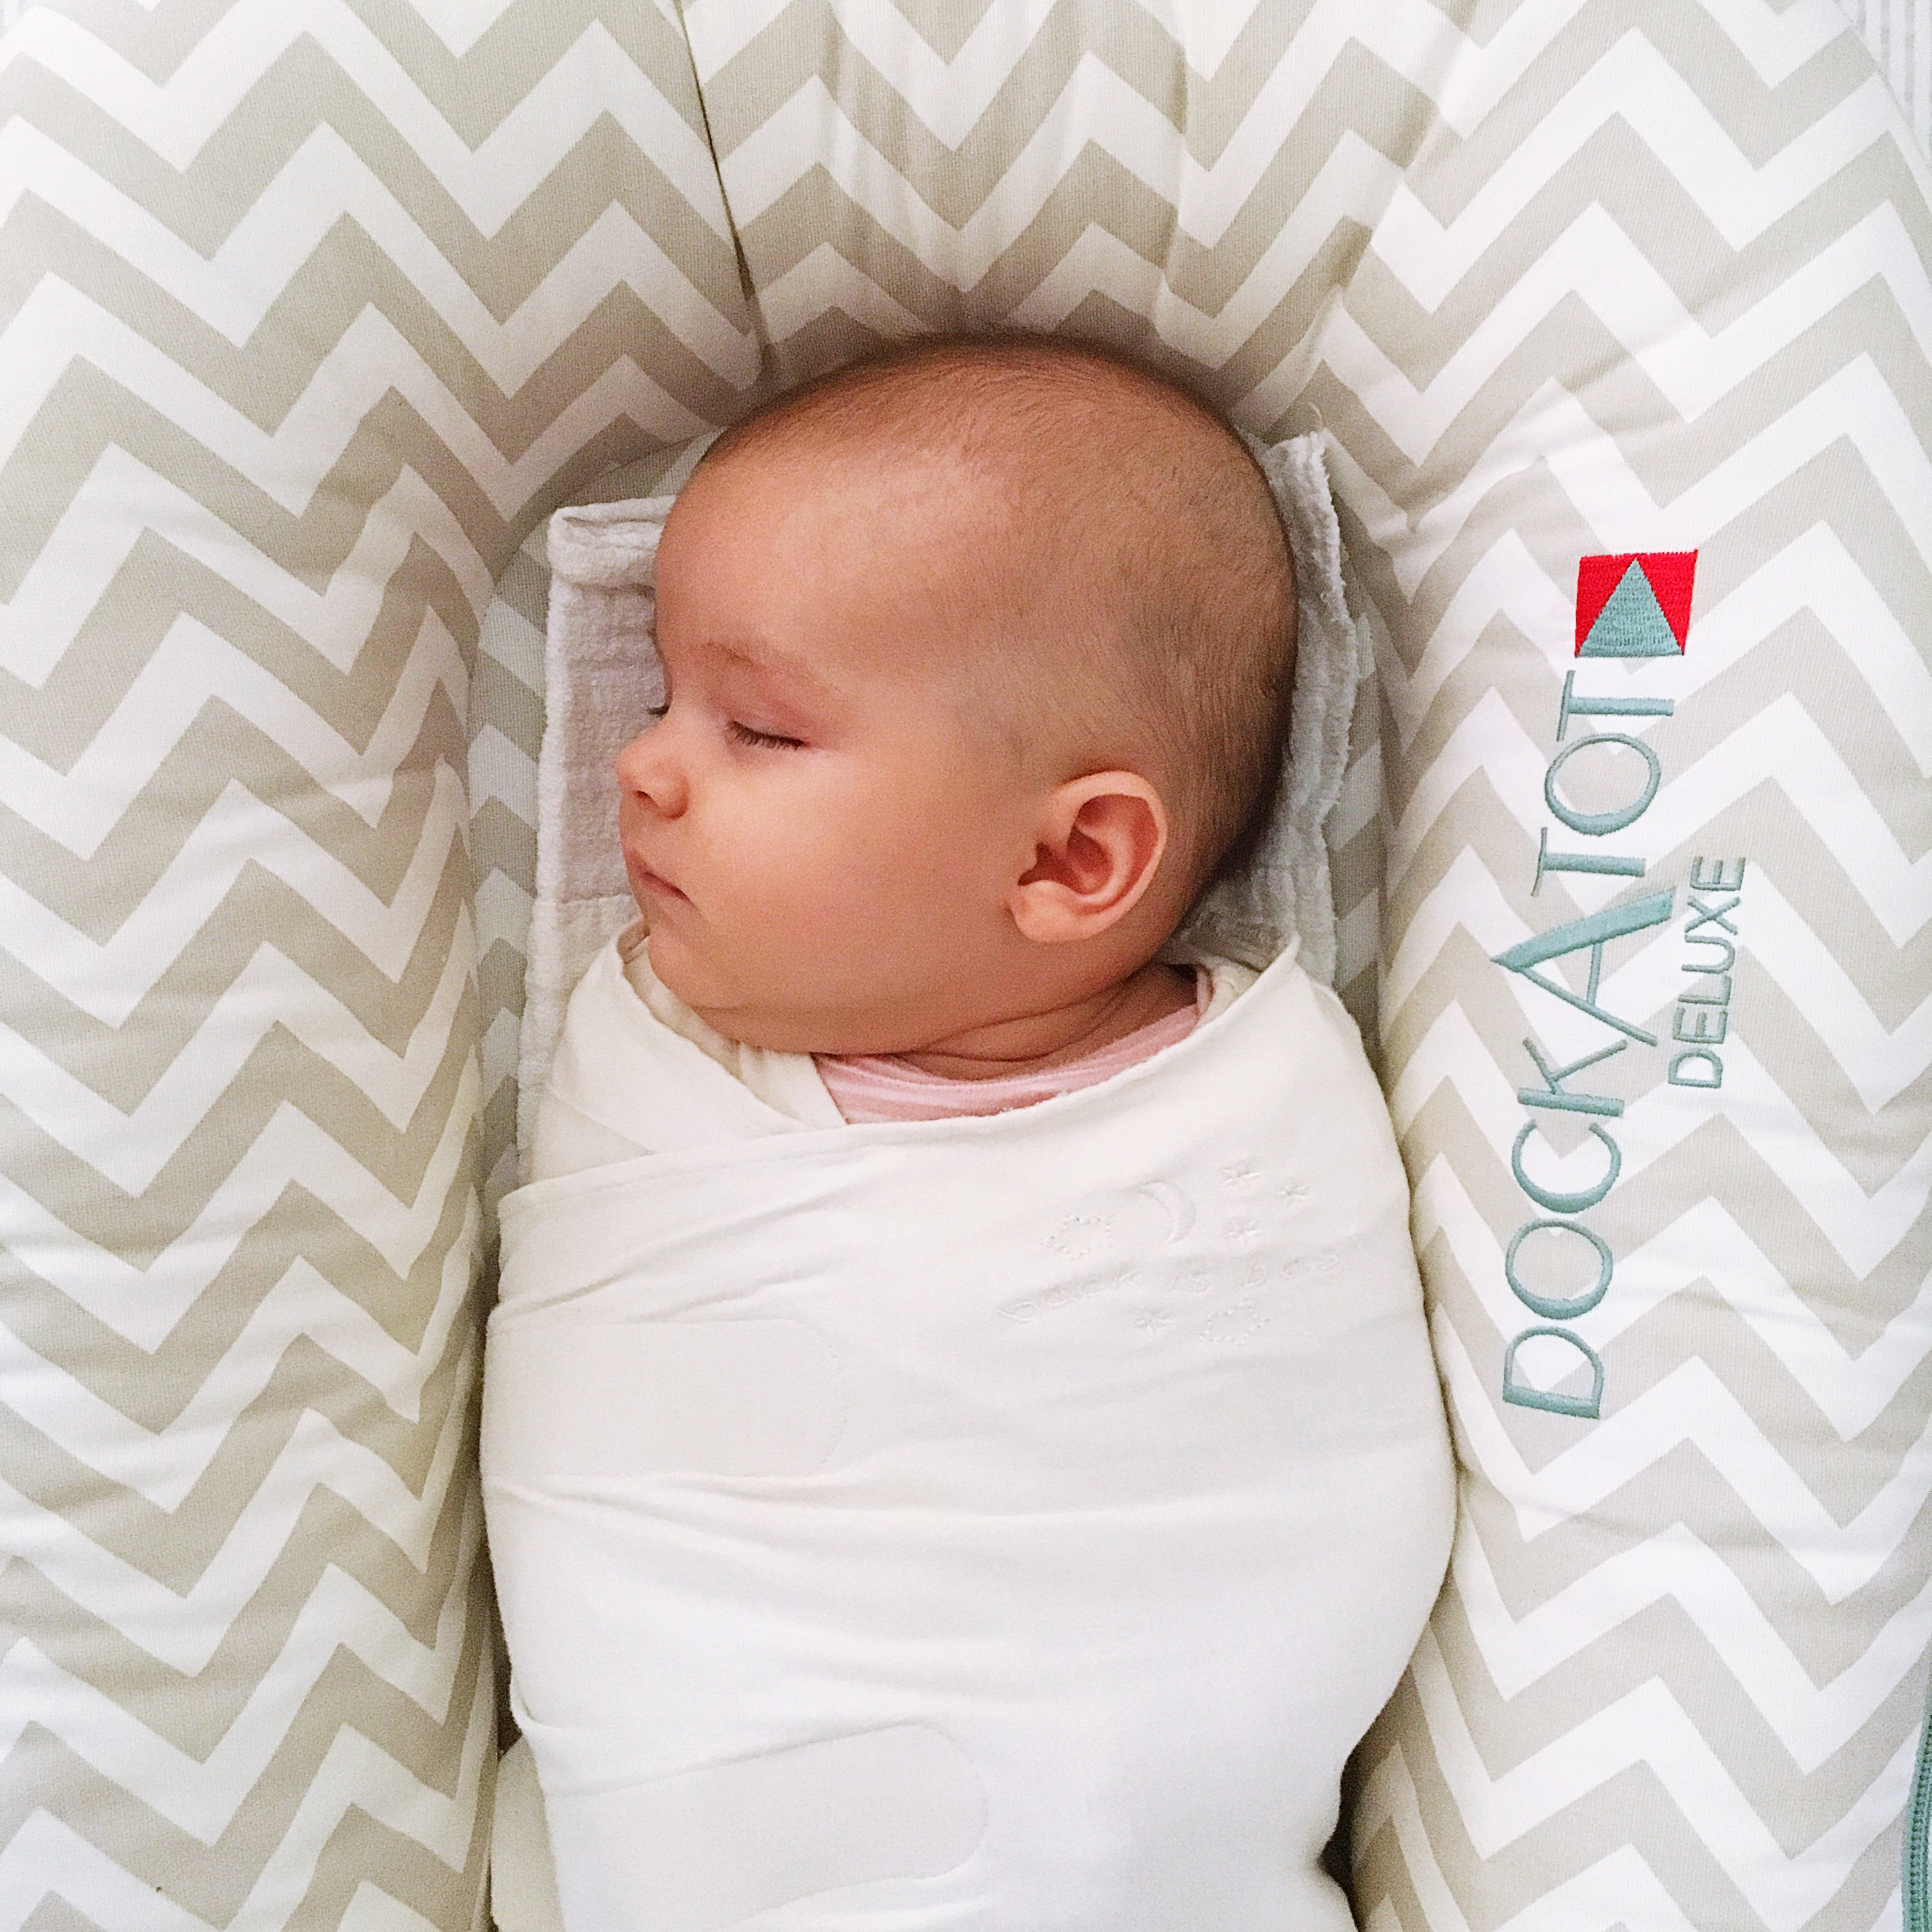
Taylor seemed to fight the swaddle for the first month of her life, so I had her sleep without it. She was waking up every 1-1.5 hours that entire time. No joke, the night I started her back in this Halo Swaddle Sleep Sack, she slept a 4 hour stretch and then 8 hours a couple days later. The more I’ve read, the more I understand that most babies really need that compression to feel cozy and secure, just like in the womb. Swaddling also helps control to Moro Reflex which causes their little arms to flail up and about uncontrollably, which often wakes them in the night for the first few months. I have an entire Pinterest board devoted to Baby Sleep – click the link and give my board a follow for a wealth of info !

Snug as a bug in her swaddle

2. Use white noise

Did you know that inside the womb sounds just a bit louder than a vacuum cleaner!? It’s no wonder that babies are comforted by loud white noise. Again, I started incorporating loud white noise as a component of Taylor’s bedtime routine around 5 weeks old, and she began sleeping through the night shortly thereafter. I didn’t think it would work, but it really did! I think it helped her be soothed back to sleep when she did wake in the night as well. We use THIS sound machine and love it. It is portable and can run on batteries, which is perfect for travel. For more items, like the sound machine, I wish I’d added to my baby registry read THIS post.

3. Establish a bedtime routine early on!

I wish I had started a bedtime routine for Taylor even earlier than I did.  The first few weeks I was totally baffled about the whole baby sleep thing and flew by the seat of my exhausted, new mama pants. However, within one week of establishing a bedtime routine for Taylor, at 5 weeks old, she began sleeping through the night! Routines help babies to understand that it is time for nighttime sleep – they’re used to sleeping during the day for the last 9+ months when you were moving around, lulling them to sleep. It makes sense that a lot of babies are confused between day and nighttime for a while, hence the waking all night long.
For newborns, a routine can be something super simple such as:
  1. Dim the lights or turn them off completely and use a nightlight (during the day I always had her nap in a bright room)
  2. Turn on loud white noise
  3. Change baby into an overnight diaper even if you just changed their diaper 30 minutes before (I use regular diapers one size larger, and cover her bum in this natural Butt Paste)
  4. Put babe into his/her PJ’s
  5. Sing a lullaby or two while swaddling
  6. Nurse or bottle feed baby while rocking
  7. *Put baby in crib drowsy but awake

*I have to pat Taylor’s belly a little bit until she drifts off, and sometime she falls asleep while nursing so I put her in the crib already asleep. From 9 weeks until about 15 weeks, we would usually need to bounce her on a yoga ball after nursing to help her get drowsy before going into her crib.

4. Make sure baby is well burped/gassed

This may seem like a no brainer to some, but I truly didn’t realize how much I would need to burp Taylor in order for her not to have gas that would keep her up. Sometimes the simplest things can have a huge impact on your babe’s ability to fall and stay asleep. They rely solely on you to make sure they aren’t experiencing discomfort. Burp, burp and burp that newborn some more until you are certain there is no gas trapped in his or her little tummy. There are also techniques to help newborns get rid of any gas that may keep them from sleeping comfortably. Sometimes Taylor would wake in the night making little grunting noise and all I would need to do is “gas” her by pumping her legs  in a bicycle motion and gently up toward her chest until there was no more gas. Then she would fall right back to sleep. I used the technique the parents show in THIS video and the massage shown in THIS video.

5. Use a swing

I’ve heard that some babies don’t like their swings, but I absolutely swear by this swing. Taylor learned to fall asleep on her own in this swing. At first you’ll have to have the swing setting on fairly high, but then you can progressively lower the speed until your baby can fall asleep with little to no motion at all. We did not have Taylor sleep in the swing at night, but it really helped her to learn the skill of falling asleep on her own, which then generalized to her nighttime/crib sleep.

You can read more from the baby sleep experts at Precious Little Sleep on getting babies (even the most sleep resistant!) to sleep in a swing HERE.

Now THAT is “sleeping like a baby”!

So there you have it – my top 5 tips for getting your newborn to sleep and stay asleep. Hopefully these tips work for your baby, and for you!

What other techniques, routines or tips do you have to get your little one to sleep?

xo, Ashley (1)

*Disclaimer: Taylor turned 4 months and the regression hit immediately. Although she is not sleeping 8-9 hours a stretch right now at 5 months (I wish!), she is still sleeping 5-6 hr stretches and waking only twice at most. We were super spoiled with her sleep as a newborn, and I still think it had much to do with these 5 tips.

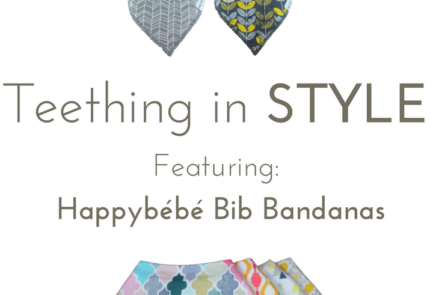
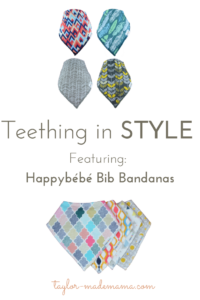
Teething In Style (featuring Happybébé)

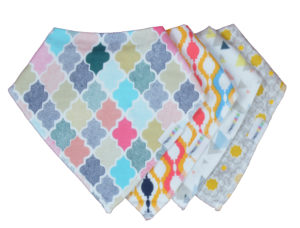
Teething In Style Bib Bandanas for baby

I was quite surprised to discover that Taylor already had two teeth buds popping through at only 3.5 months old! The perma-spit soaked onesie and St. Bernardesque drool definitely clued me in that teething was right around the corner.

If your babe drools as much as my lil early teether does, then you know they can easily require 3-4 soaked top changes a day. Not the end of the world, obviously, but it’s definitely a hassle to change out an entire outfit.

A better solution? BIBDANAS!

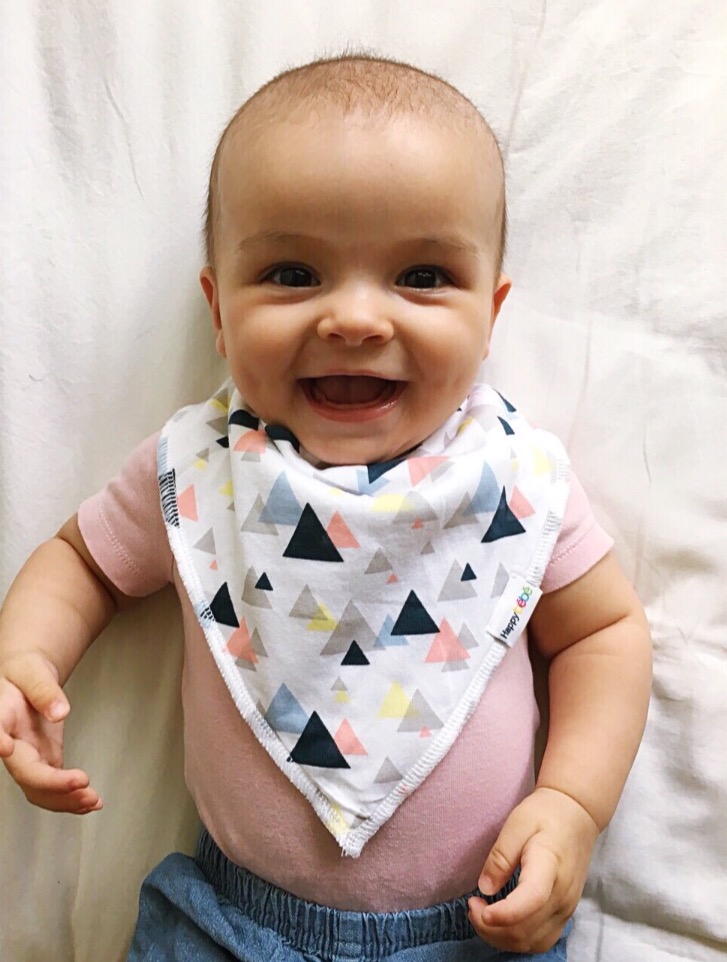
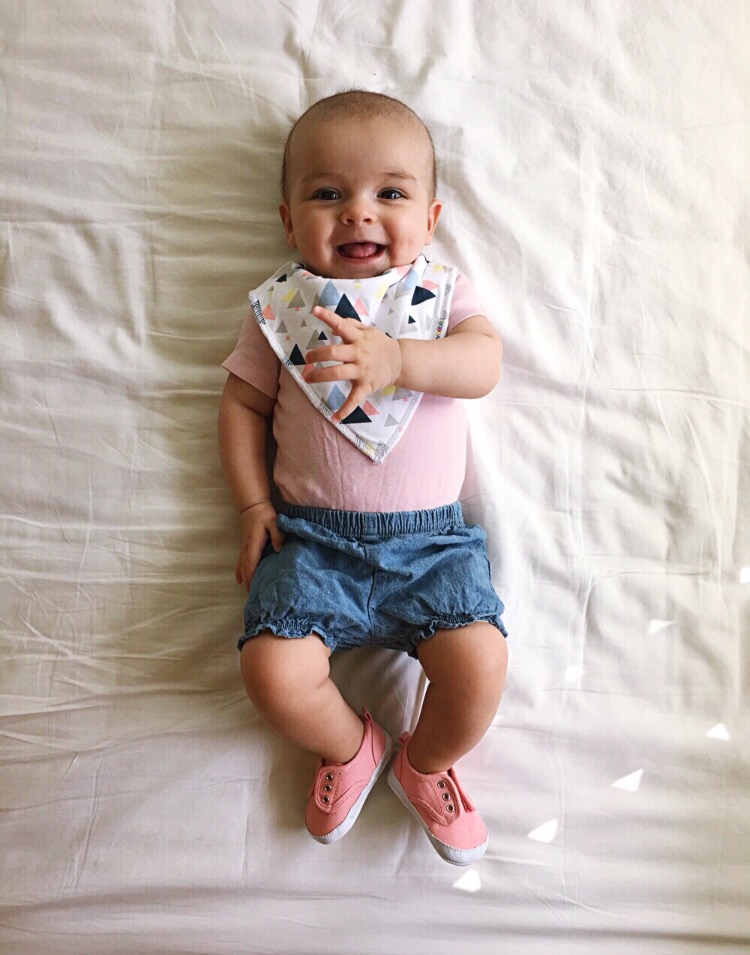
Somebody is excited about her new accessory!

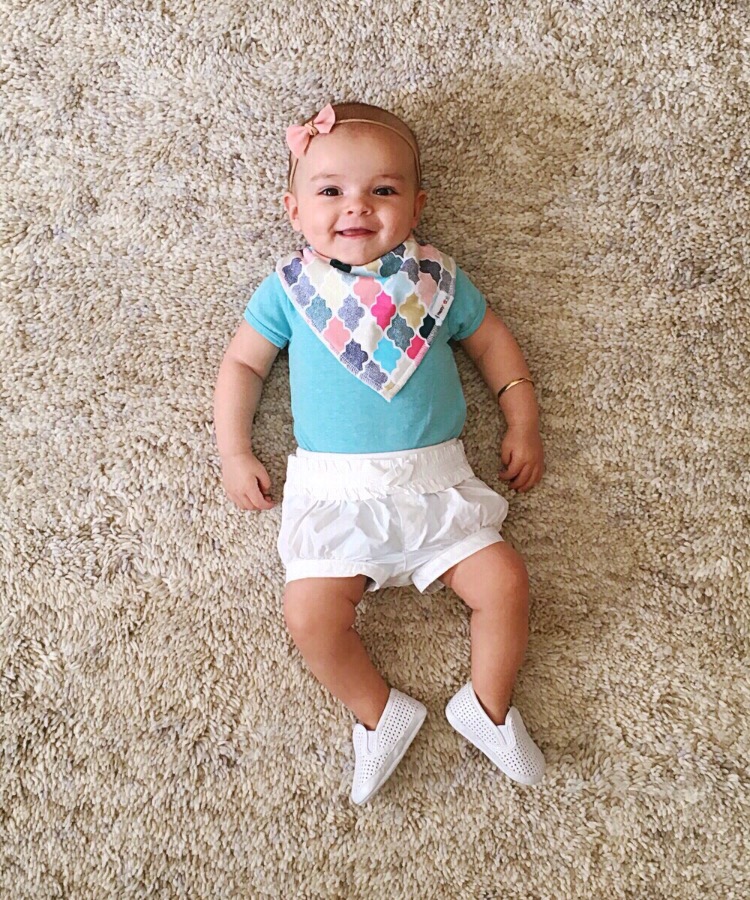
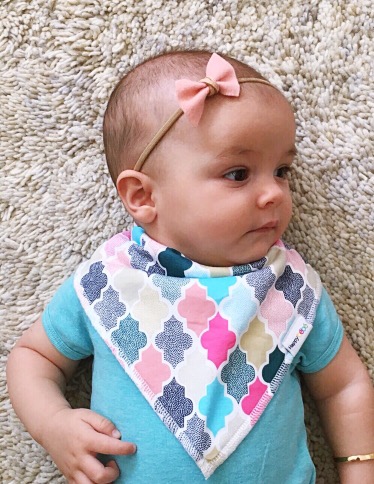
Bibdanas are much easier to swap out than going through multiple shirt/outfit changes – simply snap on and off.  Plus, I feel they add a little bit of flare to even the simplest of outfits. Throw one of these over a plain onesie and, voil¡, your babe is stylin’! These are definitely a must-have baby item.

IMG_5291
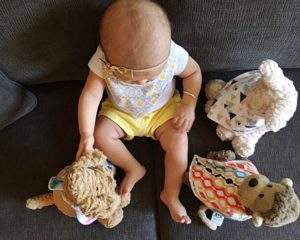
Allll the cool kids are wearin’ em!

girls-lay

Happybebe makes SUPER soft and absorbent bandana bibs that also happen to come in incredibly cute patterns for boys and girls. They’re by far my favorite bibdanas I’ve come across! Bonus – they are also very reasonably priced. I highly recommend picking up a 4 pack for your babe, or as a gift for someone else’s. Happybebe bib bandanas would also be a unique, fun add-on to a baby shower gift for a mama-to-be.

Our babies are gonna drool, so why not let them do it in style?!

Starting today, you can receive 10% off all Happybebe products on Amazon using the promo code MYBEBE10.

My happy baby in her Happybebe!
The perfect, functional baby accessory!

Thank you to Happybebe for sending us these adorable bibdanas, just in time for my early teether –

We LOVE them!

IMG_5290

xo, Ashley (1)

Taylor’s headband: Hello Kait

Onesies and Shorts: Gap/Old Navy

Shoes: Old Navy

Stuffed animals: Jellycat {see below}